Introduction
Drawing a graduation cap is a fantastic way to commemorate one’s academic accomplishments. Whether for personal or educational purposes, this article aims to provide a step-by-step guide on how to draw a graduation cap. This article is written for beginners, intermediates, and experts alike who want to hone their drawing skills. By the end of this tutorial, readers will have the necessary skillset to draw a graduation cap with ease.
Step-by-Step Tutorial
Drawing a graduation cap can seem challenging, but the process is quite simple with the right guidance. Let’s break it down.
Start by sketching a rectangle in the center of a blank sheet of paper. The rectangle represents the top part of the cap. Then, draw a small square shape on top of the rectangle. This square represents the button on the cap.
Next, draw two straight lines, one at each side of the rectangle. These lines will serve as guides for the cap’s sides. Then, extend these two lines backward in an arc shape that meets at the back of the cap.
Proceed to create the lower part of the cap. Draw a larger rectangle under the guide lines, making sure the bottom edges align with the bottom edges of the smaller rectangle. The lower rectangle should overlap with the smaller rectangle.
Finally, add the tassel hanging from the button on top of the cap. Draw a small circle at the end of a string hanging from the button, then draw a few short lines protruding from the circle. These lines will represent the fringes of the tassel.
Easy Drawing Styles
Not everyone is talented in drawing; however, it’s not a limitation. Simpler styles can be used to draw a graduation cap. You can use basic shapes such as a circle, rectangle, and triangle to create a cap. Using a cartoon-style cap can also be an easy alternative. A combination of circles for the top part and a rectangle for the bottom part of the cap can achieve this style.
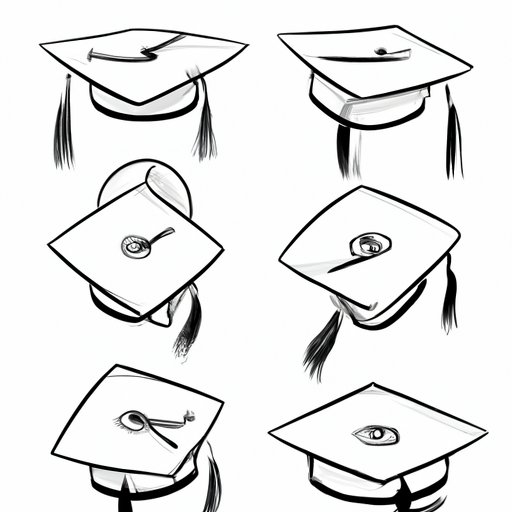
Different Angles
A graduation cap looks different from various angles. Drawing from a different view can be an exciting challenge. To draw the cap from the front, draw two guide lines, one vertical and one horizontal. From the intersection of the lines, sketch the cap’s upper part, then add the lower rectangle underneath. From the side, the cap looks like a trapezoidal shape. Draw the top part of the cap, then extend the sides downward to create the lower part. The cap viewed from the top looks like a rectangle with an intersection, which is the button.
Materials and Tools
To draw a graduation cap, you will need paper, a pencil, an eraser, and a ruler, among others. Different types of paper can be used to achieve a certain result; a rough paper will give the drawing a bold finish, while smooth paper provides a softer look. A 2H pencil is preferable for drawing guidelines, while drawing the final outline with an H pencil will produce a lighter, more defined look. An eraser can be used to correct mistakes or remove unwanted guidelines, while using a ruler will create straighter, more precise lines.
Adding Personal Touches
A unique way of making your graduation cap stand out is by adding personal touches to it. Personalizing your cap can be as easy as adding school colors or customizing the tassel using one’s favorite colors. Adding a personal flair, such as including one’s name or quotes, can make the drawing meaningful. Inspirational or educational elements like books can be included to symbolize one’s academic achievements.
Conclusion
Drawing a graduation cap can be an engaging way of expressing oneself. This article has provided a step-by-step guide to drawing a graduation cap, along with tips for creating simpler styles, drawing from different angles, using different materials and tools. By adding personal touches to your drawing, you will make it more meaningful.


