Introduction
If you’re trying to learn to draw, mastering the skills to draw an eyeball is an absolute must! The eyeball is not only one of the most crucial body parts for capturing a realistic likeness, but it also has the potential to be a captivating and mesmerizing image. In this article, we will explore how to draw an eyeball easy, providing step-by-step instructions, tips, and tricks suitable for both beginners and experienced artists.
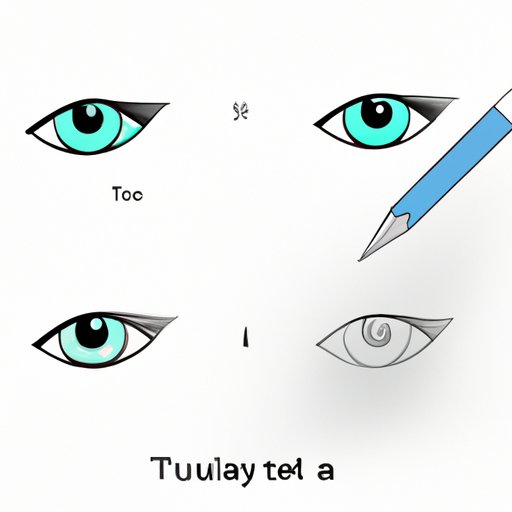
Step-by-Step Tutorial
To draw the eyeball, it’s essential to start by breaking down the process into more straightforward, smaller steps. Beginners often struggle because they see the entire complex structure of the eye and get intimidated. Start by simplifying the shape into basic forms like circles, ovals, and triangles and gradually add details.
Here are some simple steps you can follow to draw an eyeball:
- Start with a circle or oval shape that will outline the white part of the eye.
- Add another smaller circle or oval shape inside the first one, representing the iris.
- Add a tiny circle or oval shape to represent the pupil.
- Draw curved lines around the inner circle or oval shape, representing the iris’s detailed texture.
- Shade the pupil to create depth in the eye.
- Add lashes around the eyelid to complete the eye.
Remember, these are just the most basic steps. Don’t worry if you make mistakes; the beauty of art is there is no right or wrong in the creative process.
Using Basic Shapes
Utilizing basic shapes is a great technique for constructing an eye because the shapes and forms have simple and recognizable contours. It helps artists discern the proportions and shape of the eye before adding any details, resulting in a more precise and accurate drawing.
For example, the iris is typically tilted and distorted by the curve of the eyeball. Simply by drawing an oval shape will not represent the angle correctly; thus, artists must adjust the shape while incorporating shapes that would approximate that angle.
Here are a few tips for using basic shapes to construct the eyeball structure:
- Break up the process into minor steps.
- Start with big shapes before refining.
- Use outlines to represent the angles of the iris.
- Draw curved lines around the iris, following the circular shape of the eyeball.
Practice with Pencil Shading
Applying shading can enhance drawing, creating even more depth and dimension in the eye. Shading provides the artist with a method of representing a 3D object on a two-dimensional surface.
When shading an eye, you must focus on how light interacts with the surface of the eyeball. Shade areas of the eye that are indented, like the pupil or eyelid, darker. Leave the whites untouched to create the highlights that are naturally present in human eyes.
Here are some tips for pencil shading to create realistic-looking eyes:
- Squint your eyes to see the different shades of a surface.
- Use a range of pencil grades to create light and shadow.
- Draw whites of the eyes first and add shadows afterward.
- Be patient. It takes time to build up a smooth and continuous gradient.
Cartoon Style
If you’re not aiming to produce a realistic-looking eye and rather want to use an effortless, humorous approach, cartoon style is your option. This fun style enables artists to use simplified versions of the various components of the eye for fast and efficient work.
Here are some suggestions for simplifying the eye:
- Create large pupils that occupy most of the iris.
- Experiment with various colors and shapes for the iris.
- Exaggerate shapes and expressions.
- Divide the eyelashes into big groups for simplicity.
Incorporating Color
If you wan to add that extra pop to your eye drawings, color is critical. Choosing the right color and shade temperature can dramatically change the overall look of the eyeball.
Will you be doing a traditional pencil drawing or a digital art drawing? Depending on your preference, you may choose to use colored pencils, pastels, or even markers. The artist can create a stylish or realistic eye depending on the color they select.
Here are some suggestions for adding color to your eye drawings:
- If you want to produce a realistic look, focus on achieving natural shades and tones.
- Experiment with various color palettes to produce a stylized appearance.
- Utilize a limited color palette to create harmony in the artwork.
- Be consistent with the lighting in the drawing.
Drawing Illustrations from a Photo
Drawing an eye from real life or a photograph can be a new and exciting challenge. Generally, it helps you learn new skills and techniques, including the ability to pick up aspects like reflecting light in the eye.
Here are some tips for drawing an eye from a photo:
- Use a grid or guidelines to ensure the proportions are correct.
- Realize the highlights and shading to grow depth and dimensionality.
- Use your pencil as a measuring stick to compare different sections of the eye.
- Notice how the direction of light affects the eye.
Tips and Tricks
Finally, here are some additional tricks and tips that will help you improve your eyeballs drawings:
- Find inspiration or reference material from other artists.
- Keep a sketchbook handy to practice.
- Draw from life; it will give you better ideas about the proportions and shapes of the eye.
- Take a break if you get frustrated.
- Don’t be afraid to experiment to find what works best for you.
Conclusion
This article has provided you with a step-by-step tutorial that anyone, including beginners, can follow. We have explored the importance of starting with basic shapes and using pencil shading techniques. We have also talked about incorporating color, drawing in a cartoon style, and drawing illustrations from photos. Most importantly, we have provided pro tips and tricks for you to use in your future drawings.


