Introduction
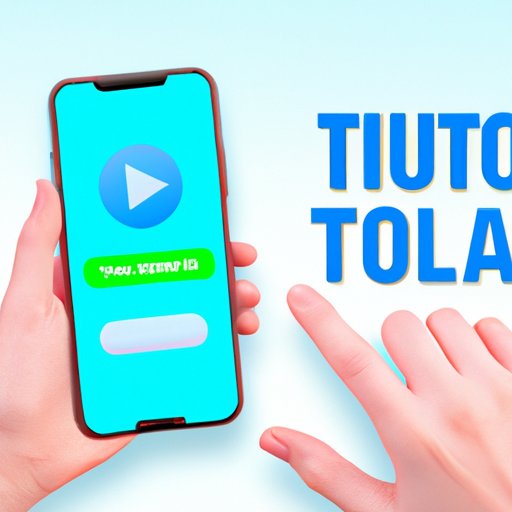
Do you want to record a tutorial on your iPhone? Maybe you want to show someone how to use a specific app or want to capture a gameplay moment to share on social media. Whatever the reason may be, screen recording on iPhone is a convenient feature that can come in handy quite often.
In this article, we’ll provide a complete guide on how to do screen recording on iPhone, including tips and tricks for capturing high-quality recordings, the best apps for screen recording, cool ways to use screen recordings, troubleshooting common problems, and more.
Step-by-Step Guide to Screen Recording on iPhone: Tips and Tricks for Capturing Your Screen
Screen recording on iPhone is a straightforward process that requires just a few steps:
1. Open Settings and tap the Control Center option.
2. Tap Customize Controls.
3. Scroll down to find Screen Recording and tap the green plus button to add it to your Control Center.
4. Swipe up from the bottom of your screen to access the Control Center.
5. Tap the Screen Recording icon, which looks like a white circle surrounded by a red outline.
6. A three-second countdown will start before recording begins.
7. To stop recording, tap the red recording icon in the top left corner of the screen or swipe up to access the Control Center and tap the same icon.
Here are some tips and tricks for capturing high-quality screen recordings on iPhone:
– Before recording, make sure your iPhone is charged and has enough storage space to save the recording.
– Record in a quiet space to avoid unnecessary background noise.
– Ensure your iPhone is positioned in a stable location to avoid any shaking or movement during recording.
– Avoid using the zoom function during recording, as this can cause distorted or blurry images.
– Consider using an external microphone to capture high-quality audio, as the iPhone’s built-in microphone may not pick up all sounds.
After recording, you may want to edit your screen recording to remove any unwanted footage or add text annotations. iPhone offers basic editing tools, such as trimming clips and adding text, but you may want to use a third-party app for more advanced editing.
The Best Screen Recording Apps for iPhone: Our Top Picks for High-Quality Screen Captures
If you’re looking for more advanced editing features or want to record with more control, consider using one of these screen recording apps for iPhone:
1. DU Recorder – HD Screen Recorder: This app offers high-quality recording options with various customization settings, including resolution, bit rate, and frame rate. You can also add text and stickers to your recordings before sharing.
2. AZ Screen Recorder – Video Recorder: This app allows you to record high-definition video without having to root your device. You can edit and trim your recordings directly within the app and share them on social media platforms.
3. QuickTime Player: If you prefer recording on your computer, QuickTime Player is a built-in program on Mac that allows you to mirror your iPhone’s screen and record it. This can be useful for creating longer tutorials or recording longer gameplay sessions.
5 Cool Ways to Use Screen Recording on Your iPhone: From Gaming to Remote Work
Screen recording can be used for more than just recording tutorials or gameplay. Here are some creative uses for screen recording on iPhone:
1. Record a workout routine to share with friends or for personal reference.
2. Create a time-lapse video of a cooking process.
3. Record a video resume to highlight your skills and experience.
4. Capture and share remote work processes with colleagues.
5. Record a FaceTime call or other video chat with loved ones.
Troubleshooting iPhone Screen Recording: Common Problems and How to Fix Them
Here are some common issues that may arise while screen recording on iPhone and how to fix them:
– Recording won’t start: Check that you have enough storage space on your device and that your iPhone is charged. If the issue persists, try resetting your device and restarting the recording process.
– Recording is laggy or choppy: Ensure your iPhone is in a stable location and avoid using the zoom feature during recording. You may also want to reduce the recording resolution or frame rate.
– Audio is distorted: Ensure your device’s microphone is not blocked or covered and avoid recording in noisy environments. You may also want to use an external microphone for better audio quality.
Screen Recording vs. Screenshotting: When to Choose Which Method for Your iPhone
While screen recording can offer more information than a screenshot, sometimes a quick snapshot is all you need. Here are some instances when to choose between screen recording and screenshotting on iPhone:
– Screenshot if you want to capture a brief moment or image.
– Screen record if you want to capture a process or step-by-step tutorial.
– Screenshot if you want to capture a specific detail or image, such as a quote or a single screen.
– Screen record if you want to capture longer content or fluid motion, such as gameplay or app usage.
How to Edit and Share Your iPhone Screen Recording: Tips for Making Professional-Quality Videos
After recording, you may want to edit and share your screen recording to social media platforms or colleagues. Here are some tips and tricks for making professional-quality videos:
– Edit your video to remove any unwanted footage or add text annotations.
– Add background music or narrations to your screen recordings for a more engaging video.
– Choose the right video format and resolution for the platform you’re sharing on.
– Use video hosting platforms like YouTube or Vimeo for longer tutorials or instructional videos.
Conclusion
In conclusion, screen recording on iPhone can be a useful tool for recording tutorials, gameplay, or processes. With this complete guide, you have learned how to screen record on iPhone step by step, tips and tricks for capturing high-quality recordings, the best screen recording apps for iPhone, cool ways to use screen recordings, troubleshooting common problems, and editing and sharing your recordings. By following these techniques discussed, you can create professional-quality videos that make it easy for others to follow along.


