Introduction
If you are looking to transform your home by installing new tiles in your kitchen, bathroom or other areas, then you need to know how to cut tiles. Cutting tiles can be a challenging DIY project, but it can be made simpler by using the right tools and techniques. This article will explore the steps involved in cutting tiles, highlighting the tools and techniques required, to help you achieve a neat and professional-looking finish.
Step-by-Step Guide
Cutting tiles requires the use of different tools, including a tile cutter, tile nippers, a wet saw, and a snap cutter. The type of tile and the cutting technique required will determine the appropriate tool to use. Below is a step-by-step guide on how to cut tiles:
Step 1: Measure the tile accurately: Begin by measuring the section of tile that needs to be cut with a tape measure. Mark the cut line on the surface of the tile using a pencil or a marker.
Step 2: Prepare the tile cutter: If you have a tile cutter, adjust it to the thickness of the tile. Place the tile in the cutter aligning the score line to the top of the cutter, then apply pressure to the tile to snap it in two.
Step 3: Use tile nippers for curved cuts: Use tile nippers to cut pieces of tiles for curves or other shapes. Grip the tile with the nippers and squeeze to remove small pieces of tile until the required shape is achieved.
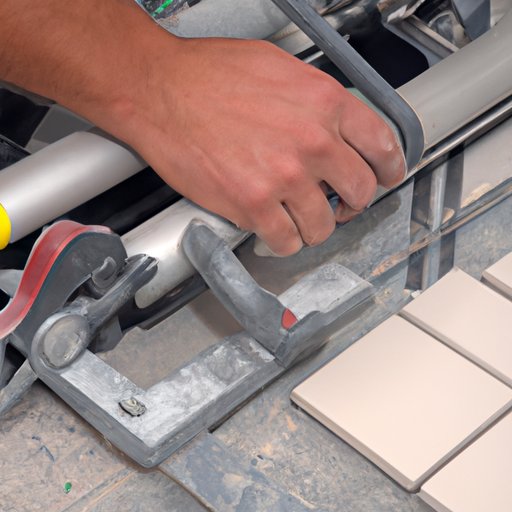
Step 4: Use a snap cutter for straight cuts: If you have a snap cutter, place the tile on it and align the cut line. Push down on the lever to score the tile’s surface, then snap the tile in two by pressing on either side of the cut.
Step 5: Use a wet saw for complex cuts: A wet saw is ideal for cutting tiles into complicated shapes, including angled cuts. Wear protective gear as wet saws can be loud and messy. Align the tile on the saw, according to the guide marks, and then cut with the blade.
Step 6: Smooth the cut edges: Once you’ve made the cut, use a tile file or sandpaper to smooth the edges. This will eliminate any sharp edges or rough surfaces that may cause accidents.
Tips and Tricks
Cutting tiles can be tricky, especially if you are a beginner. Here are some tips and tricks to make the process simpler:
– Always wear protective gear, such as safety glasses and gloves, to prevent accidents
– Work slowly and carefully, taking regular breaks to avoid getting tired or fatigued. You will be able to work more precisely this way.
– When using a snap cutter, always score the tile with the appropriate pressure to avoid uneven cuts. Practice on a few unwanted tiles to perfect your technique.
– When using a wet saw, make sure you have a full tank of water to cool the saw blade. Also, align the tiles straight to avoid crooked cuts.
Video tutorial
Here is a video tutorial that demonstrates how to cut tiles in real time:
[Insert YouTube video link here]
This video includes a step-by-step breakdown of all the tools and techniques required to properly cut tiles. You can use the video as a visual guide to help you understand the process better.
Tool reviews
Here are some tools you can use for cutting tiles, along with their pros and cons:
– Manual tile cutter: Pros: Portable and easy to use; Cons: May not work for all types of tiles
– Tile nippers: Pros: Affordable and useful for curved cuts; Cons: Not suitable for straight cuts or complex shapes
– Snap cutter: Pros: Ideal for straight cuts; Cons: Not ideal for complex shapes or thicker tiles
– Wet saw: Pros: Precise and can handle any type of tile; Cons: Expensive and not portable
Based on their pros and cons, the wet saw offers the most versatility across different types of tiles, while manual cutters are a great budget-friendly option.
Safety Precautions
Here are some safety precautions you should take when cutting tiles:
– Always wear protective gear, such as safety glasses, gloves, and ear protection, to avoid injuries while cutting tiles.
– Before using any tile cutting tool, read the safety instructions carefully to avoid accidents.
– Keep your work area clean and uncluttered to avoid tripping over cables, tools, or tiles.
Tile Cutting Usage
Cut tiles can be used for a range of purposes, including floor and wall finishes, decorative or artistic creations, and backsplashes.
– Backsplashes: Backsplashes offer a great opportunity to showcase your creativity with tile shapes, taking inspiration from different colours, patterns, or textures.
– Flooring: Tile flooring is a durable and long-lasting option that offers a polished look to any space. Consider mixing up tiles shapes and designs to add a touch of personality.
– Wall Finishing: Tiles can be used in bathrooms as a waterproof finish that is more durable than paint or wallpaper. Mix and match different tile shapes and colours to create a unique finish.
Tile Cutting Trends
Tile cutting trends evolve over time, and right now, some current trends include creating unique patterns and designs with tile cutting techniques.
– Geometric designs: Geometric patterns are on the rise, with hexagonal, triangular and circular patterns making a comeback.
– Textured tiles: Textured tiles provide a unique personality to any space. Consider using textured tiles for a backsplash or flooring.
– Mixed materials: Combining different materials such as tile and stone, or glass and ceramic can make an extraordinary visual impact.
Conclusion
Cutting tiles requires practice, patience, and the right tools. By following this step-by-step guide, you’ll be able to achieve precise, professional-looking tile cuts for any DIY project. Remember to always put safety first, choose the right cutting tool for the job, and take your time. The creative use of tiles can be endless, whether you are considering backsplashes, flooring, or wall finishing. Experiment with different textures, patterns, and designs to add personality and interest to any space.


