I. Introduction
If you’ve ever wondered how celebrities achieve those chiseled cheekbones and sculpted jawlines, you’re not alone. Contouring is a makeup technique that can give you a more defined and polished look, but it can also be intimidating for beginners. In this article, we’ll break down the steps for you and provide advice on the best products to use based on your skin type. We’ll also review popular products on the market, offer celebrity-inspired looks, discuss seasonal contouring and common mistakes to avoid.
II. Step-by-Step Tutorial
Before we dive into the products, let’s start with a clean face. Begin by applying your foundation and concealer as you would normally do. Next, identify the areas where you want to contour – typically beneath your cheekbones, along the jawline, and on the sides of your nose.
Now, you need to choose the right contouring product – powder, cream or stick – that matches your skin tone. Using a brush slightly smaller than your blush brush, apply the product where you would like to create a shadow effect. Too much product can make your appearance unnatural, so start with a light-handed application and build up gradually.
After applying the contouring product, you need to blend it in well with a clean brush or sponge to avoid harsh lines. Pro-tip: Always blend in an upward motion as it creates a more natural look. When you’re happy with the first side, repeat the process on the other side of the face.
The next step is to add highlighter, which contrasts the shadow you just created. It’s best to use a lighter product for this step, such as a highlighter stick, liquid or cream highlighter. Apply the product above the contoured areas, in the center of your face, and on your forehead if you choose.
Like the contouring step, blend the highlighter in well to avoid any harsh lines. Finish the look by setting the makeup with a setting powder.
To illustrate each step, we’ve included images below:
//Insert Tutorial Images Here
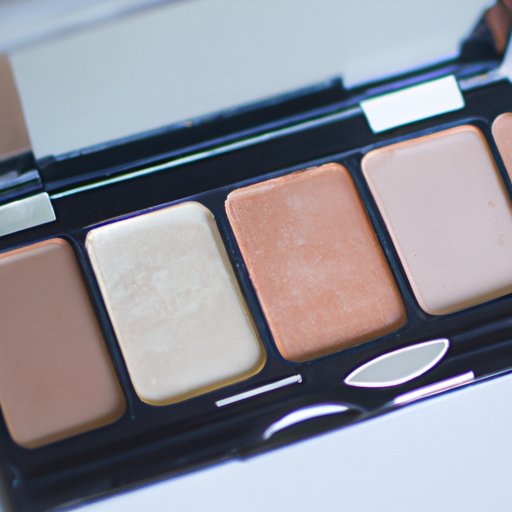
III. Product Review
Picking the right contouring product can make or break your makeup routine. It’s essential to choose a shade that’s close to your skin tone and a product that works well with your skin type. We’ve tested some popular contouring products on the market, and here are the results:
Nars Contour Blush
This two-in-one blush and contour powder duo provides a subtle yet defined look. It blends easily and is versatile for all skin types. The texture is soft, and it lasts all day.
Maybelline Face Studio Master Contour Stick
This contour stick offers a creamier texture that’s easy to blend. The stick applicator is convenient, making it ideal for travel or touch-ups on the go. It’s suitable for all skin types, and you can easily build up from a subtle to more intense contour.
Anastasia Beverly Hills Contour Cream Kit
If you’re into cream products, this kit is for you. It offers six shades that match various skin tones, including yellow and neutral undertones. The texture is creamy, easy to blend, and perfect for dry skin types.
We recommend the Nars Contour Blush for those new to contouring. It’s easy to use and creates a natural look. For those with dry skin, go for the Anastasia Beverly Hills Cream kit. Finally, for those who prefer the stick form, the Maybelline Face Studio Contour Stick is a great option.
IV. Celebrity-Inspired
Now let’s switch it up and get some inspiration from celebrities. Here we’ll give you a breakdown of Taylor Swift’s famous contouring technique:
Taylor Swift Inspired Look
- Start by applying blush on the apples of your cheeks.
- Apply a light contour shade from the top of your ear to the corner of your mouth.
- Then apply a darker contour shade underneath the light contour shade.
- Blend these two shades together.
- Next, apply highlighter to your forehead, bridge of your nose, cheekbones, and cupid’s bow.
- Blend the highlighter in well for a natural look.
- Finish off the look with some setting powder to lock everything in place.
Here is how to recreate Taylor Swift’s look in images:
// Insert Taylor Swift Inspired Look Images Here
V. Seasonal Contouring
Contouring techniques differ across the seasons. In summer, for instance, you might want to switch to cream products because they glide over your skin effortlessly and produce a dewy finish. For autumn and winter, you may want to try a matte texture because it’s less likely to melt in the heat. Here are some other seasonal tips you may find useful:
- Spring: Light contour, pastel blush, and subtle highlight.
- Summer: Cream contour, coral blush, and high-shine highlight.
- Fall: Warm contour, dark blush, and matte highlight.
- Winter: Deep contour, rosy blush, and iridescent highlight.
For a visual guide, see below:
// Insert Seasonal Contouring Images Here
VI. Common Contouring Mistakes
Now, let’s go over some common mistakes to avoid when contouring:
- Mistake: Choosing the wrong shade.
- Tip: Test out a few products to find your perfect match.
- Mistake: Using too much product.
- Tip: Build up coverage gradually.
- Mistake: Not blending well.
- Tip: Use a clean brush or sponge and blend upward.
- Mistake: Highlighting in the wrong places.
- Tip: Highlight above the areas you contoured.
- Mistake: Sucking in your cheeks to contour.
- Tip: Work with your natural features and use a light hand.
Here are some images to illustrate the dos and don’ts of contouring:
// Insert Common Contouring Mistakes Images Here
VII. Conclusion
In conclusion, mastering the art of contouring takes practice and patience but can give you a polished and defined look. Remember to choose the right product, blend well, and work with your natural features. Don’t forget to have fun and share your results on social media using the hashtag #contouringlikeapro.


