Introduction
Are you an avid gamer and a Tesla Model 3 owner? Do you find the car’s built-in controls insufficient for your entertainment needs? Fret not! In this article, we will explore the ultimate guide to connecting your Xbox controller to your Tesla Model 3.
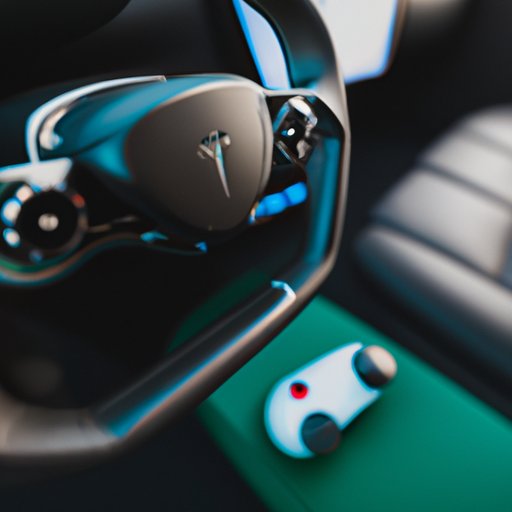
Many Model 3 owners are not aware that it is possible to pair their Xbox controller with their car’s infotainment system. Doing so allows you to enjoy your games and media using a familiar and comfortable controller, rather than using the touchscreen controls or the mobile app.
Our purpose today is to help you overcome this problem and enable you to connect your Xbox controller to your Tesla Model 3.
The Ultimate Guide to Connecting Your Xbox Controller to Your Tesla Model 3
Before we dive into the specifics, let’s take a moment to understand why an Xbox controller is a great accessory for a Tesla Model 3. The controller is a well-designed and ergonomic device, with responsive and precise tactile feedback. Additionally, many games support the controller natively, so you can jump right into your favorite titles without worrying about compatibility issues.
The steps involved in connecting an Xbox controller to a Tesla Model 3 are straightforward and easy to follow. First, ensure that your car’s Bluetooth is turned on. Next, put your Xbox controller in pairing mode by pressing and holding the Xbox button and the sync button on the controller’s top simultaneously until the Xbox logo starts flashing. Finally, open the Bluetooth settings on your Tesla Model 3, select ‘Pair new device,’ and select the controller from the list of available devices.
Once you have paired your Xbox controller, you can enjoy many benefits of using it with your Tesla Model 3. For example, you can use the controller to play games, navigate the car’s interface, control media playback, and adjust various settings. The controller also provides haptic feedback, meaning that you will receive physical feedback in response to your actions in the game or the car’s interface.
5 Simple Steps to Connecting Your Xbox Controller to Your Tesla Model 3
Now that we have covered the basics let’s delve into the actual process of connecting your Xbox controller to your Tesla Model 3. The following five steps provide a straightforward guide to pairing your controller with your car’s infotainment system. We recommend following these steps closely to ensure a successful connection.
1. Turn on your Tesla Model 3 and ensure that Bluetooth is enabled.
2. Turn on your Xbox controller by pressing the Xbox button in the center of the controller.
3. Press and hold the Xbox button and the sync button simultaneously until the Xbox logo starts flashing.
4. Go to your Tesla Model 3’s Bluetooth settings, select ‘Pair new device,’ and wait for the controller to appear in the list of available devices.
5. Select the controller from the list, and wait for the car to pair with the device. Once the pairing is successful, your Xbox controller is ready to use with your Tesla Model 3.
It is essential to note that the Tesla Model 3 only supports Bluetooth LE-compatible devices, so make sure your Xbox controller is an updated version with Bluetooth LE support.
A Gamer’s Guide to Syncing Your Xbox Controller with Your Tesla Model 3
If you are an experienced gamer and want to customize your controller’s settings to suit your preferences, this section is for you. Here are some tips for syncing your Xbox controller with your Tesla Model 3.
Once you have paired your Xbox controller with your Tesla Model 3, you can customize its button mapping to map the controller’s buttons to the car’s features, such as the horn and turn signals. To do this, select ‘Game Controller Settings’ under the ‘Controls’ tab in your Tesla Model 3’s settings menu. From here, you can map the controller’s buttons to perform specific actions of your choice.
You can also adjust the controller’s sensitivity and vibration settings from the same menu. This can help you fine-tune your gaming experience and make it more immersive and enjoyable. Experiment with these settings until you find the ones that suit you best.
How to Easily Connect Your Xbox Controller to Your Tesla Model 3: A Step-by-Step Tutorial
If you need a more detailed guide for pairing your Xbox controller with your Tesla Model 3, this section is for you. The following steps provide a step-by-step guide to pairing your controller with your car’s infotainment system. We recommend following these steps closely and troubleshooting any issues you encounter before proceeding to the next step.
1. Turn on your Tesla Model 3 and ensure that Bluetooth is enabled by tapping the Bluetooth icon on the top right corner of the screen.
2. Turn on your Xbox controller by pressing the Xbox button in the center of the controller.
3. Press and hold the Xbox button and the sync button simultaneously until the Xbox logo starts flashing.
4. On your Tesla Model 3’s screen, tap the ‘Media’ app icon at the bottom of the screen.
5. Tap the ‘Phone’ icon at the bottom of the screen, and then tap the ‘Pair New Device’ button.
6. On your Xbox controller, press the sync button once to initiate pairing mode.
7. Your Tesla Model 3 should recognize your Xbox controller and display it in the list of available devices. Select the controller from the list.
8. Wait for the car to pair with the device. Once the pairing is successful, your Xbox controller is ready to use with your Tesla Model 3.
If the pairing fails, try restarting your Tesla Model 3’s infotainment system and your Xbox controller, ensuring that they are both updated to the latest firmware versions. You can also try resetting your Tesla Model 3’s Bluetooth settings and attempting the pairing process again.
Using Your Xbox Controller with Your Tesla Model 3: Tips and Tricks
Now that you have successfully paired your Xbox controller with your Tesla Model 3, it’s time to fully enjoy it. Here are some additional tips and tricks for using an Xbox controller with a Tesla Model 3:
- You can adjust the audio settings of your Tesla Model 3 while gaming or watching media by using the controller. Simply press the right/left triggers on the controller to increase/decrease the volume, respectively.
- If you experience input lag or other issues while gaming, make sure your Tesla Model 3 is adequately charged and has good internet connectivity.
- Some games may require an internet connection to play, so make sure your Tesla Model 3 is connected to a reliable Wi-Fi or mobile data network.
- It is crucial to keep your Xbox controller charged to avoid disruption during long play sessions. You can charge the controller using a USB cable or a charging dock.
Gaming on the Go: How to Pair Your Xbox Controller with Your Tesla Model 3
Finally, let’s explore how you can use your Xbox controller with your Tesla Model 3 while on the go. The process is simple and straightforward, and you can enjoy your games and media during long car trips.
First, ensure that your Tesla Model 3 is in park and the emergency brake is on. Next, follow the same pairing process that we described earlier, and you’re good to go. Keep in mind that safety should always be your top priority, so avoid gaming or watching media while driving.
Conclusion
In conclusion, we’ve explored the ultimate guide to connecting your Xbox controller to your Tesla Model 3. We started by explaining why an Xbox controller is a great accessory for a Tesla Model 3. Then, we provided a step-by-step guide to pairing the controller with your car’s infotainment system and highlighted some tips and tricks for customizing and using the controller. Finally, we discussed how to use the controller while on the go and provided some essential safety reminders. We hope that this guide has been useful and that you now feel confident in pairing your Xbox controller with your Tesla Model 3. Share your experiences with us in the comments below.


