I. Introduction
A wax warmer is an essential tool for anyone who enjoys using wax for hair removal, aromatherapy, or other purposes. It is important to clean and maintain your wax warmer properly to ensure that it continues to function safely and effectively. This guide will provide you with step-by-step instructions, natural cleaning solutions, tips for removing stubborn wax buildup, and safety precautions that you should take when cleaning your wax warmer.
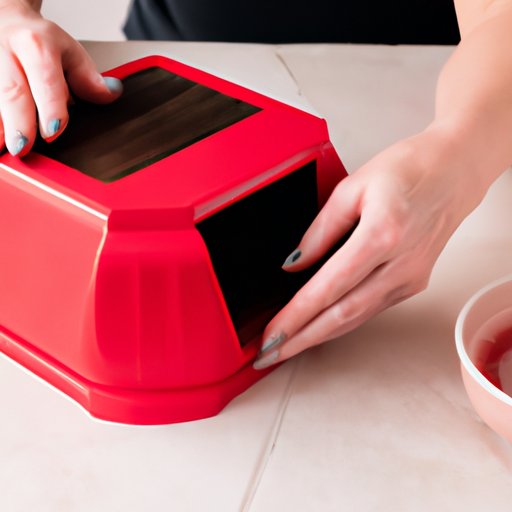
II. A step-by-step guide to cleaning your wax warmer
Before you begin cleaning your wax warmer, be sure to unplug it first. Here’s what you’ll need:
- Cotton balls
- Paper towels
- Cleaning solution (such as rubbing alcohol or a specialized wax warmer cleaner)
Follow these steps to clean your wax warmer:
- Allow the wax in the warmer to cool and harden. This will make it easier to remove.
- Use a cotton ball or paper towel to wipe out as much wax as possible. Be careful not to scratch the surface of the warmer.
- Apply a small amount of cleaning solution to a paper towel or cotton ball and wipe down the interior and exterior of the warmer. Be sure to remove any remaining wax residue.
- Repeat this process until all wax residue has been removed.
- Clean the removable wax pot or dish with soap and warm water. Dry thoroughly before reinserting it back into the warmer.
III. Natural cleaning solutions for your wax warmer
If you’re looking for a more natural way to clean your wax warmer, there are a few options available. Vinegar and baking soda are both effective choices:
- Vinegar: Mix equal parts of white vinegar and water and apply to the interior and exterior of the warmer with a cotton ball or paper towel. Wipe with a clean, damp cloth to remove any remaining residue.
- Baking soda: Mix a tablespoon of baking soda with a small amount of water to make a paste. Apply the paste to the interior and exterior of the warmer and scrub gently with a soft-bristled brush. Rinse with warm water and dry thoroughly.
It’s important to note that although these natural solutions are effective, they may not be as quick and powerful as specialized cleaners. You may need to repeat the process several times to achieve the desired level of cleanliness.
IV. Common mistakes to avoid when cleaning your wax warmer
When cleaning your wax warmer, it’s important to avoid these common mistakes:
- Using sharp objects to remove wax residue, which can scratch the surface of the warmer and create a breeding ground for bacteria.
- Submerging the warmer in water or other liquids, which can damage the electrical components and create a safety hazard.
- Using harsh chemicals on the interior or exterior of the warmer, which can cause damage or discoloration.
Making these mistakes can cause serious safety hazards and can also shorten the lifespan of your wax warmer.
V. Importance of regular cleaning and maintenance for your wax warmer
Cleaning and maintaining your wax warmer on a regular basis is key to keeping it in good working condition and avoiding safety hazards. Experts recommend cleaning your wax warmer after every use to prevent wax buildup:
- Between every use: wipe the interior of the warmer with a paper towel or cotton ball to remove any remaining wax residue.
- Monthly: clean the removable wax pot with soap and warm water and wipe the interior of the warmer with a cleaning solution.
- Bi-annually: disconnect the warmer from the power source and clean the exterior with a cleaning solution.
Regularly cleaning and maintaining your wax warmer will not only help it function better but also prevent potential safety hazards, such as electrical fires due to wax buildup.
VI. How to remove stubborn wax buildup from your wax warmer
Over time, wax buildup can accumulate in hard-to-reach areas of your wax warmer. Here are some tips for removing stubborn wax buildup:
- Use a toothpick or cotton swab to gently loosen the wax residue in hard-to-reach areas.
- Use a specialized wax warmer scraper tool to remove stubborn wax buildup from the interior of the warmer.
- If all else fails, place the removable wax pot or dish in the freezer for a few hours. The wax will harden and become easier to remove.
VII. Safety tips for cleaning your wax warmer
When cleaning your wax warmer, it’s important to take the following safety precautions:
- Disconnect the wax warmer from the power source before cleaning.
- Avoid using harsh chemicals on the interior or exterior of the warmer.
- Do not submerge the wax warmer in water or other liquids.
- Be careful not to scratch the surface of the warmer when removing wax residue.
- Allow the wax warmer to cool completely before cleaning.
VIII. Conclusion
In conclusion, cleaning and maintaining your wax warmer is not only important for keeping it in good working condition but also for preventing potential safety hazards. By following the step-by-step guide, using natural cleaning solutions, avoiding common mistakes, and taking safety precautions, you can ensure that your wax warmer continues to provide you with quality performance for years to come.
Remember to clean your wax warmer regularly and remove stubborn wax buildup to avoid potential safety hazards. By taking proper care of your wax warmer, you can enjoy the many benefits it has to offer.


