I. Introduction
Welcome to this comprehensive guide on how to clean and maintain your Waterpik! This article aims to provide step-by-step instructions, expert advice, and best practices for keeping your device in top condition, ensuring optimal oral hygiene results. Regular maintenance and cleaning of your Waterpik are essential to prevent infections and maintain oral health. In this guide, we will cover materials and tools needed, step-by-step instructions, best practices, and an expert interview with an oral hygiene specialist.
First, let’s briefly touch on the importance of oral hygiene and the benefits of using a Waterpik.
II. Step-by-Step Guide on How to Clean Your Waterpik
A. Materials and tools needed for cleaning
Before diving into the step-by-step cleaning process, it’s essential to have the right materials and tools. Here’s what you will need:
- Clean, warm water
- White vinegar or hydrogen peroxide
- A soft-bristled toothbrush
- A clean cloth
Each item is necessary for different cleaning steps to get rid of bacteria and other debris.
B. Step-by-step instructions for cleaning your Waterpik
The following are step-by-step instructions on how to clean your Waterpik:
- Unplug the device from the power source before starting.
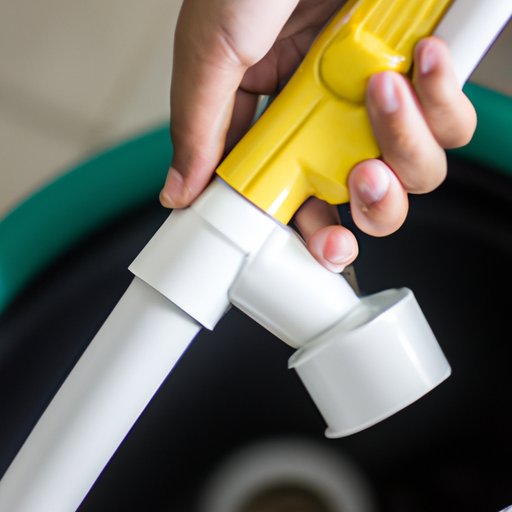
- Detach the reservoir from the device carefully.
- Eject any remaining water from the reservoir and use warm water to rinse it.
- Prepare a solution of white vinegar or hydrogen peroxide and water (3 parts water to 1 part vinegar or peroxide).
- Submerge the reservoir in the solution for about an hour, then rinse it thoroughly with warm water.
- Use a soft-bristled toothbrush to clean the lid, mouthpiece, and internal parts of the reservoir.
- Detach the tip from the device and rinse it thoroughly with warm water.
- Remove the water hose carefully and submerge it in the vinegar or peroxide solution for about an hour before rinsing it out with warm water.
- Use a clean cloth to wipe the device, the area around the reservoir, and the power cord.
- Reassemble the device once everything is dry, and it’s ready to use.
C. How often you should clean your Waterpik
It’s crucial to stay on top of maintaining your Waterpik. You should clean your device once every three months at the minimum. If you use it more often or have a higher risk of gum disease, it’s best to clean it more frequently. Additionally, always perform an internal inspection of the device to ensure everything is clean and working correctly.
To keep your device in top condition, consider using a Waterpik cleaner periodically. Not only can this help to disinfect the device, but it can also prevent clogs and damage from build-up.
III. Best Practices for Cleaning And Maintaining Your Device
A. Overview of the benefits of using a Waterpik for oral hygiene
Before diving into the best practices, let’s talk about why a Waterpik is a valuable tool for oral hygiene. A Waterpik can help clean between teeth, where a toothbrush and floss can’t reach. As a result, this helps to prevent gum disease, cavities, and bad breath. Using a Waterpik can also save you time by cutting down on the time it takes to floss and brush your teeth.
B. Explanation of the best practices for cleaning and maintaining your device
To keep your device functioning well and safe to use, here are some of the best practices to observe:
1. How to avoid common mistakes
One common mistake that people make is not changing the water frequently enough. It’s essential to flush out any remaining water after each use and replacing it with fresh, clean water. Additionally, avoid using hot water when cleaning the Waterpik; warm water is ideal as hot water can cause damage to the internal parts.
2. Tips on how to keep your Waterpik working effectively
For effective functioning and to prevent reduce the chances of buildup inside the device, flush out your Waterpik thoroughly after each use. Don’t leave the device in the base or tip down when not in use as this can cause moisture buildup. You should also avoid sharing your device with other people to maintain hygiene safety.
3. Explanation of how to identify mold or faulty parts
If you see mold in the reservoir or elsewhere in your device, do not use and check for any faulty parts. Mold is a harmful organism, and continued use of the device can lead to health problems. Check for any loose connections or other physical damage that may have occurred while cleaning.
4. What to do when your device isn’t working the way it should be
If your device isn’t working correctly, firstly, check your device’s manual for instructions and troubleshooting tips. Examine for any parts you might need to replace, such as the hose or a broken seal. If you are unsure of how to maintain the device, consider consulting with an expert.
IV. Comparison of Different Cleaning Methods for Waterpiks
A. Overview of different cleaning methods for Waterpiks
There are different cleaning solutions available in the market specifically designed for hygiene devices such as the Waterpik. Check for FDA-approved solutions that are safe for use in oral hygiene devices. Some of the popular cleaning methods to consider are white vinegar, hydrogen peroxide, and citric acid.
B. Tips on how to choose the right cleaning solution
When selecting the right cleaning solution for your device, consider the following factors:
1. Based on the type of Waterpik you have
Certain cleaning solutions may be recommended for specific models, such as a device with a larger reservoir tank. It’s essential to consult the user manual when choosing a cleaning solution to avoid any damage.
2. Factors to consider when choosing a cleaning solution
When selecting a cleaning solution, consider the type of cleaning solution, the concentration, and its intended use. It’s also important to ensure that a cleaning solution can be used for stainless steel, plastic, or other materials used in the device’s construction.
V. Troubleshooting Guide for Common Issues
A. Explanation of common issues that users may face
Sometimes your device may have problems that can be fixed easily. Here are common issues that users might experience:
- Clogging: This happens when water or debris blocks the hoses or the tip.
- Ineffective pressure: If the device is dirty in areas that may come into contact with water, this may cause reduced pressure levels.
- Leaking: This may happen due to a cracked or improperly seated tip, hose, or reservoir.
B. Tips on how to troubleshoot these issues
The following are basic troubleshooting steps you can perform to fix common Waterpik issues:
1. How to identify mold or faulty parts
If you notice mold growing inside the reservoir or elsewhere in the device, replace the reservoir or the device. If there are faulty parts causing issues, consider getting them repaired by a professional.
2. What to do when your device isn’t working the way it should be
If your device isn’t working correctly, first, check that there’s enough water in the reservoir and ensure that it’s connected correctly. Check for any clogs or any visible parts that may need cleaning. Lastly, refer to the troubleshooting section in the user manual for additional assistance before consulting an expert.
VI. Frequently Asked Questions (FAQ)
A. Comprehensive FAQ section covering all the most common queries and concerns that users may have when it comes to cleaning and maintaining their Waterpik
Here are the most common questions and answers about maintaining and cleaning a Waterpik:
Q: How often should I change the water in the reservoir?
A: The water in the reservoir should be changed after each use to prevent bacteria buildup.
Q: How often should I replace the tips on my device?
A: Waterpik tips should be replaced every three to six months or whenever the bristles begin to show wear and tear.
Q: Is it safe to use a Waterpik if I have braces?
A: You can safely use a Waterpik if you have braces. However, to avoid complications, consult with your orthodontist before using it.
VII. Expert Interview with a Dentist or Oral Hygiene Specialist
A. Explanation of the importance of expert advice
To provide additional valuable insight, we interviewed an oral hygiene specialist on the best practices for cleaning and maintaining a Waterpik. The following is an interview with the specialist:
Q: What’s your recommendation for someone who has just purchased a Waterpik device?
A: I suggest reading the user manual carefully before using it and keeping a cleaning schedule to ensure the device is always in top condition.
Q: What’s the best cleaning solution for my Waterpik device?
A: White vinegar and hydrogen peroxide solutions are great options that can kill bacteria and keep your Waterpik working effectively.
Q: Can a Waterpik replace brushing and flossing entirely?
A: While a Waterpik is an excellent addition to your oral hygiene routine, it doesn’t replace brushing and flossing. It’s essential to maintain a comprehensive oral hygiene routine.
VIII. Conclusion
Remember, a Waterpik is not just a useful oral hygiene tool; it also requires adequate maintenance. Proper cleaning and regular maintenance can prevent harmful infections, maintain effective function, and ensure the device lasts for an extended period. By following the guidelines outlined in this article and utilizing the frequently asked questions and expert interviews, you can be sure that your Waterpik is in tip-top condition, powering your oral hygiene routine for years to come.
So, take the first step toward optimal oral health by following these steps mentioned in this article.


