I. Introduction
Having clean ice is essential for keeping your drinks and foods healthier. With a dirty or contaminated ice maker, you risk consuming bacteria that can cause illness. This makes it vital to maintain your ice maker consistently. In this article, we will take a look at the efficient ways to clean your ice maker and provide you with some time-saving tips that will help you make the process more manageable.
II. Step-by-Step Guide to Cleaning an Ice Maker
When cleaning your ice maker, it’s important to note that the process might differ slightly depending on the model. However, the basic principle stays the same. Here are the steps you can take to clean your ice maker:
- Gather necessary materials: Before cleaning your ice maker, ensure that you have the following materials on hand: a bucket, gloves, a soft cloth, a cleaning solution, and a new water filter, and a scrub brush such as a toothbrush.
- Turn off ice maker: Start by turning off the ice maker and disconnecting it from the wall or switch off the power supply.
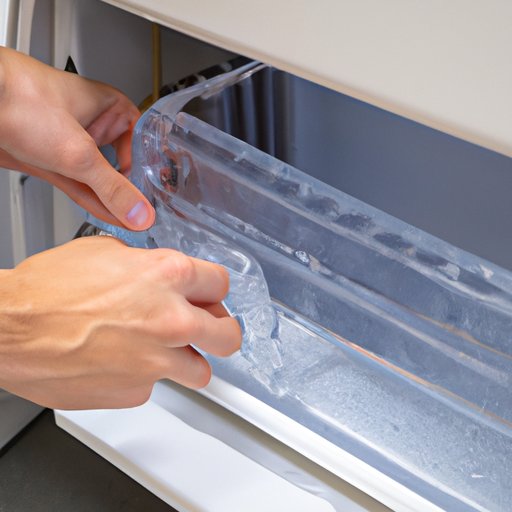
- Remove ice maker parts and clean them thoroughly: Take out the ice bin and any other removable parts. Clean the parts with soap and warm water to remove any dirt or grime. Scrub the parts gently using a brush such as a toothbrush; ensure every corner is clean. Avoid using harsh abrasives and submerging any electrical parts in water.
- Sanitize ice maker: Once you’ve cleaned the ice maker’s parts thoroughly, sanitize them with a commercial cleaner or a cleaning solution made of vinegar and water. Mix one-part vinegar with ten parts water and put the solution in a spray bottle. Then, spray the solution on all the parts of the ice maker and let it sit for a few minutes to kill any bacteria, mildew or mold. Afterward, rinse the parts with warm water and allow them to dry completely between uses.
- Reassemble ice maker: After sanitizing and cleaning all the removable parts, reassemble the ice maker and turn it on.
III. Time-Saving Tips for Cleaning an Ice Maker
Cleaning your ice maker is an essential task that must be carried out regularly to keep the appliance in optimal condition. Here are some time-saving tips that can make the cleaning process more manageable:
- Use Natural Cleaning Agents: Vinegar and baking soda are good natural cleaning agents that can clean and sanitize your ice maker effectively. They are inexpensive and readily available.
- Practice Regular Maintenance on the Ice Maker: Consistent measures such as replacing the air filter and water filter are necessary for improving the efficiency of the ice maker. Regular maintenance ensures you always have ice on hand.
- Use Tools That Make the Cleaning Process Easier: A powerful vacuum cleaner and cleaning solutions are ideal tools that can make the cleaning project go faster, especially in those challenging areas like deep crevices and corners where the dirt accumulates.
IV. Troubleshooting Tips for Common Ice Maker Issues
Even after cleaning your ice maker, you may still encounter some issues that affect its performance. Here are some common problems and solutions:
- Low ice production: Sudden low ice production could be due to clogged water or air filters. When you notice this, check the filter and clear the clog. Another possible cause could be that the fridge temperature is too high or too low. Check and adjust it within the range stated in the user manual.
- Ice that tastes bad: Ice that tastes bad can be due to a dirty water system or a refrigerator that is not clean. Clean the fridge or freezer and replace the water filter if necessary.
- Other common issues and their solutions: When experiencing other common ice maker issues such as ice that is discolored or misshapen, ensure that the ice maker water supply line is clean and that you are using a high-quality filter. Additionally, check the water pressure to make sure it’s not too high or low.
V. Benefits of Regularly Cleaning an Ice Maker
Regular cleaning of your ice maker has a lot of benefits that go beyond the obvious hygiene advantage. Here are a few of these advantages:
- Better Quality Ice: When you maintain and clean your ice maker, you are sure of high-quality, pure ice that is free from bacteria and other contaminants.
- Reduced Risk of Contamination: Regular cleaning and maintenance of the ice maker limit the risk of spreading harmful bacteria and germs throughout your household or business place.
- Extended Life of the Appliance: Cleaning not only enhances the appearance of your ice maker but also extends the lifespan of the appliance.
VI. Video Tutorial for Cleaning an Ice Maker
If you prefer a video tutorial, here’s a step-by-step demonstration of how to clean your ice maker:
[Link to video tutorial showing step-by-step ice maker cleaning process]
Follow along as this video demonstrates the process of cleaning an ice maker step by step. The video showcases tips, tricks, and tools that make the process more manageable.
VII. Conclusion
Regular maintenance and cleaning of your ice maker are essential in ensuring pure, high-quality ice and extending the appliance’s lifespan. Follow the steps outlined here, use natural cleaning agents, and maintain the appliance regularly. If you encounter any issues affecting your appliance, troubleshoot using the tips provided herein. Don’t forget that cleaner ice is healthier, and the benefits of keeping your ice maker clean and maintained outweigh the effort put in.


