Introduction
If you’re concerned about the air quality in your home or office, cleaning your air ducts is a smart move. Dirty air ducts can harbor allergens, dust, and other debris that circulate through the air, impacting the health and well-being of everyone around. Fortunately, cleaning air ducts is a relatively easy job that you can do yourself with the right tools and equipment. In this article, we’ll discuss how to clean air ducts, what tools you need, the importance of clean ducts, and common mistakes to avoid.
Step-by-Step Guide to Clean Air Ducts
Cleaning your air ducts is a seven-step process that requires some preparation and the right equipment. Follow these steps for efficient air duct cleaning:
Step 1: Turn off the HVAC System
Before you start cleaning, it’s important to turn off the heating, ventilation, and air conditioning (HVAC) system. Otherwise, dust and debris will continue to circulate in the air. Flip the switch on the thermostat or use the breaker to stop the system.
Step 2: Remove and Clean Air Duct Covers
Using a screwdriver, remove the air duct covers from the walls or ceilings. Place them in a large sink or bathtub filled with warm, soapy water. Scrub the covers with a cleaning brush or sponge and rinse them thoroughly with water. Dry them with a clean towel before reattaching them to the walls.
Step 3: Vacuum the Air Ducts
Attach a vacuum cleaner hose with a long attachment to the duct openings. Use the suction power of the vacuum to dislodge and collect dust and debris that has accumulated inside the ducts. Work your way from the furthest duct, towards the HVAC unit. The vacuum’s HEPA filter ensures that the dust is collected without releasing it back into the air.
Step 4: Clean Air Duct Grilles and Registers
Remove duct grilles and registers and clean them thoroughly with a brush or sponge soaked in soapy water. If you see some damage, now could be an excellent time to replace them. Wipe them dry and replace them carefully. If screws need to be returned, ensure that the tighten to avoid any vibrations during operation.
Step 5: Clean the Blower Motor and Fan
Locate the blower motor and fan and use a vacuum attachment or brush to remove any dust and debris. Take care to avoid damaging these components, which are critical to the functionality of the HVAC unit. You may also want to consult a technician to ensure proper maintenance.
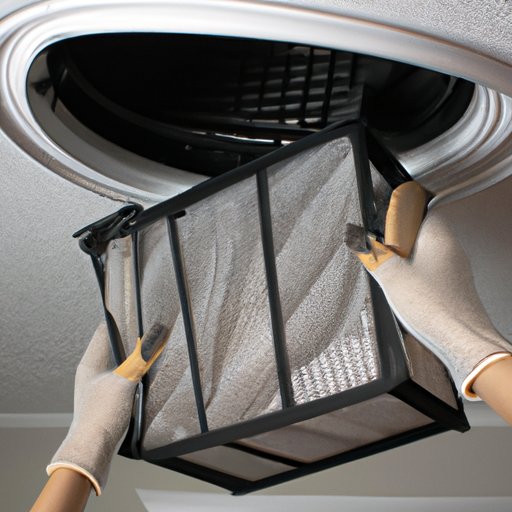
Step 6: Replace Air Filters
After cleaning the air ducts, it’s often recommended to replace the air filters in the HVAC unit itself. This can help improve indoor air quality and prevent dust and debris from accumulating in the ducts so quickly. Replace the filter according to the manufacturer’s instructions.
Step 7: Turn on the HVAC System
Once you’ve completed all these steps, you can switch on the HVAC unit again. Take note of any changes you notice in the air quality or how the system runs. The process can be time-consuming, so it’s best to dedicate a day to clean all the air ducts in your home or office completely.
Tools and Equipment for Air Duct Cleaning
When you’re ready to clean your air ducts, you’ll need a few essential tools and pieces of equipment, including:
– A vacuum cleaner with hose and attachments, including a HEPA filter
– A screwdriver to remove the air duct covers
– A duct cleaning brush to dislodge dust and debris from the walls of the duct
– Gloves to protect your hands from dust and debris
– Air filter replacements to install after cleaning the ducts.
Importance of Air Duct Cleaning
The benefits of having clean air ducts include:
– Improved indoor air quality, which is essential for individuals suffering from respiratory illnesses or conditions such as asthma
– Cleaner systems which require less maintenance over time, potentially saving on annual heating expenses
– Removing dirt buildup also prevents pollutants, unpleasant odours, and potential allergens from entering the living space, providing health benefits for everyone.
Professional vs. DIY Cleaning
Now that you know the importance of air duct cleaning, you may be wondering whether to take on the task yourself or hire a professional cleaning service. There are pros and cons to each approach.
DIY Cleaning Pros
– Cost-effective when carrying out the cleaning yourself, and additional air filters can be changed by yourself, reducing maintenance costs.
– You have more control over the process.
– Cleaning is easier when carried out in your own time.
DIY Cleaning Cons
– The upfront expense of renting or purchasing equipment.
– Time-consuming process, especially if you have limited tools or experience.
– There is less guarantee that the same level of cleanliness will be achieved through DIY cleaning compared to professional cleaning.
Professional Cleaning Pros
– Professional cleaners have specialized equipment and experience, ensuring thorough cleaning and minimizing the risk of damage to HVAC equipment.
– They may offer warranties and guarantees for their work.
– Saving time performing cleaning yourself gives you the ability to perform other necessary work while ensuring the cleaning is done to high quality.
Professional Cleaning Cons
– Professional cleaning can be expensive compared to conducting the work yourself, with many factors affecting the price.
– Maintenance precautions, as while guarantees are offered, it is still necessary for post-maintenance observations performed by the homeowner.
Common Mistakes to Avoid
Some common mistakes to avoid while cleaning your air ducts include:
– Not wearing gloves or using appropriate face protection, allowing debris and dust to affect your health.
– Not turning off your HVAC system, causing dust to spread and preventing the use of a vacuum.
– Using the wrong type of filter, which can be ineffective or even cause problems with the system.
– Not cleaning thoroughly enough, leaving some build-up that can end up leading to the same problem.
Signs of Dirty Air Ducts
Several indications that your air ducts might need cleaning may include:
– Dust, debris, or other particles that emit from air registers and vents.
– Foul smell or unexplained odours when the HVAC system turns on.
– Excessive dirt, cobwebs or mould around the system components.
– House members suffering from respiratory issues or seem to be frequently unwell.
FAQs About Air Duct Cleaning
Q: How often should air ducts be cleaned?
A: Air ducts should be cleaned every two to five years, depending on indoor air quality, pets, and smokers, among other factors.
Q: Do air duct cleaning chemicals harm people or pets?
A: They pose little risk if used properly and as instructed.
Q: How can I ensure the air duct cleaning was effective?
A: Conduct visual checks of ductwork before resealing and using your HVAC system.
Conclusion
Once you’ve cleaned your air ducts, you can enjoy cleaner air that’s free of dust and allergens. More than that, you may notice positive effects on indoor air quality and your family’s health. Remember to schedule and perform regular air duct cleaning every few years, or sooner, when necessary. Follow the steps in our guide, use the right tools and cleaning the air ducts properly, and you’ll breathe easier. Ultimately, clean air ducts contribute substantially to better home health.


