Introduction
Have you ever turned on your fan and noticed that it’s blowing more dust than air? Dust buildup on a fan can lead to poor air quality, respiratory problems, and reduced effectiveness. However, cleaning a fan can be a daunting task. In this article, we’ll provide you with a step-by-stop guide on how to clean a fan properly and maintain it for optimal performance.
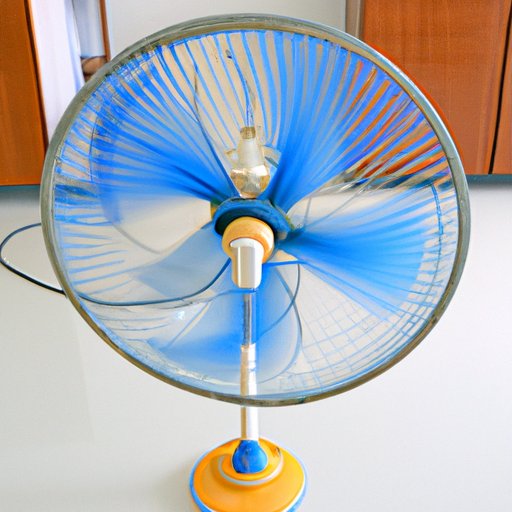
Step-by-Step Guide on Cleaning a Fan
Cleaning a fan can be tricky but following a step-by-step guide can make the process easier and more organized. The following are the steps to clean your fan properly:
1. Unplug the fan: Before you start cleaning the fan, ensure it’s unplugged from the power source. This way, you’ll avoid getting an electric shock.
2. Disassemble the fan: Remove the front and rear grills of the fan to access the blades and motor. Depending on your fan type, you may require a screwdriver to remove some parts.
3. Remove the blades and motor: Carefully remove the blades and motor from the housing, and detach the wire connectors.
4. Clean the blades: The blades are the dirtiest part of the fan, and they require cleaning every three to six months. Wipe them down with a damp cloth or use a cleaning solution to remove the buildup.
5. Clean the grills and housing: The grills and housing are often neglected, yet they require cleaning at least once a year. Use a damp cloth to wipe down the entire unit, removing dust and debris.
6. Clean the motor: The motor is essential to the fan’s performance and requires gentle cleaning. Use a damp cloth to wipe the motor’s exterior, being careful not to damage the interior components.
7. Reassemble the fan: Start by reattaching the motor and blades, ensuring they’re in the right place. Reattach the grills and snap them into position.
Why Clean Fans are Important for Clean Air and Energy Efficiency
Cleaning your fan not only improves air quality, but it also improves the fan’s energy efficiency. A dirty fan can lead to decreased airflow, making it work harder and putting a strain on your electricity bill. Regular cleaning can lead to the following benefits:
1. Improved indoor air quality: Removing dust and debris from fan components can help improve air quality. Dust particles and allergens can circulate through the air when a fan is not clean.
2. Energy efficiency: A clean fan means better airflow and less energy required to perform. Removing the buildup can make it run smoother, reducing energy consumption, and saving you money.
3. Better performance: A clean fan leads to improved airflow and longer-lasting fan blades.
Easy DIY Cleaning Solutions
You don’t need fancy cleaning products to clean your fan. Here are some easy DIY cleaning solutions you can try:
1. Vinegar solution: Mix equal parts vinegar and water in a bowl. Dip a microfiber cloth in the solution and wipe down the blades, housing, and grills.
2. Dish soap solution: In a bowl, mix 2 tablespoons of dish soap with warm water. Dip a microfiber cloth in the solution and use it to wipe the blades, housing, and grills.
3. Baking soda solution: Mix equal parts of baking soda and water in a bowl. Dip a microfiber cloth in the solution and use it to wipe down the fan blades.
How to Remove Tough Stains or Buildup from Fan Blades and Components
Sometimes fan blades and components may have tough stains or buildup that require extra attention. Here are some tips for removing tough buildup from fan blades and components:
1. Use a toothbrush: Dip a toothbrush into the vinegar solution and scrub tough stains on the blades or grills.
2. Soak in a cleaning solution: Let components soak in a cleaning solution like vinegar and water for a few minutes before scrubbing or wiping down.
3. For tower fans: Use a vacuum cleaner or a can of compressed air to clean the grille and housing.
Comparison of Different Types of Fans and Cleaning Methods
Different types of fans require different cleaning methods. Here’s a comparison of cleaning methods for different types of fans:
1. Tower fans: Tower fans are easy to disassemble and usually require cleaning every three months. Use a vacuum cleaner or compressed air to clean the housing and grilles.
2. Ceiling fans: Use a ladder and a microfiber cloth or vacuum cleaner to clean blade surfaces.
Tips on Maintaining a Clean Fan Over Time
Cleaning your fan is only one part of maintaining it. Here are some tips on maintaining a clean fan over time:
1. Avoid placing the fan in dusty areas: Placing the fan in a dusty area leads to quicker dust buildup, which means more cleaning.
2. Clean it regularly: Regular cleaning can help keep the fan clean, improve the air quality, and prevent buildup.
3. Use a cover: Using a cover when the fan is not in use can keep dust and debris from settling on it.
Alternative Methods for Cleaning Fans
There are alternative methods for cleaning fans that you can try. These methods include:
1. Using compressed air: A can of compressed air can be used to clean between the grills and housing of a tower fan.
2. Using a vacuum cleaner: The brush attachment on a vacuum cleaner can be used to clean ceiling fan blades.
Conclusion
Cleaning your fan is essential for a cleaner and more efficient living space. We’ve provided you with a step-by-step guide on how to clean your fan properly and maintain it for optimal performance. Remember to always follow safety precautions when cleaning your fan and use the proper cleaning solutions. By regularly cleaning your fan, you’ll breathe easy and save on energy costs in the long run.


