Introduction
Random Access Memory (RAM) is a crucial component of any computer system, responsible for storing and accessing data regularly used by its processor. Without sufficient and functional RAM, your computer may underperform, experience crashes, errors, or even fail to boot. It is essential to identify and resolve RAM issues to ensure optimal performance and prevent data loss or corruption. In this article, we will explore various methods and tools for checking your computer’s RAM and diagnosing potential problems.
The Basic Method: Checking RAM Using the Built-in Windows Utility
Windows provides a built-in diagnostic tool for checking your RAM, primarily designed to detect memory problems that may cause system crashes, freezes, or blue screens. Follow these steps to access the Windows Memory Diagnostic tool:
Step 1: Press the “Windows” key, type “Windows Memory Diagnostic,” and click on the suggested result.
Step 2: Choose between “Restart now and check for problems” (recommended) or “Check for problems the next time I start my computer.”
Step 3: Wait for the diagnostic tool to check your RAM, which may take several minutes.
The diagnostic tool will provide a summary of the results once the test is done. If any problems are detected, try replacing your RAM or contact a professional technician. If the results are inconclusive, try repeating the diagnostic test and see if the errors persist.
Third-Party Software: Using Memtest86+ to Test Your RAM
While the Windows Memory Diagnostic tool is sufficient for basic RAM checks, it does not offer advanced features and testing options. Memtest86+ is a free third-party software that provides in-depth and comprehensive RAM testing, including particular hardware configurations and low-level parameters. Here’s how to use it:
Step 1: Download the Memtest86+ software from their official website and save it to your computer.
Step 2: Insert a USB drive of at least 1GB and format it to the FAT32 file system.
Step 3: Run the downloaded Memtest86+ file and follow the prompts to create a bootable USB drive for the software.
Step 4: Restart your computer and boot from the USB drive by changing your BIOS settings.
Step 5: Allow the Memtest86+ software to check your RAM, which may take several hours depending on your computer’s specifications.
Once the testing is done, Memtest86+ will provide detailed results indicating any RAM errors found, including memory size, access speeds, and other technical details that allow users to pinpoint the exact problem.
Hardware Diagnostic Tools: Running a Diagnostics Test on Your RAM
Some computer manufacturers provide their hardware diagnostic tools that are specifically designed to test the hardware components of their devices, including RAM. These tools offer more in-depth and accurate testing than built-in Windows utilities or third-party software. Here are some examples of hardware diagnostic software:
HP Diagnostics: This tool is available for HP computers, offering various hardware tests, including RAM. To access it, restart your computer, press the F2 key, and select “HP PC Hardware Diagnostics UEFI” to perform a System Extensive Test.
Hitachi Drive Fitness Test: This tool is designed explicitly for Hitachi hard drives, offering comprehensive and stress testing options, including RAM and error detection. You can download it from their official website and run it from a bootable CD or USB drive.
Manual Inspection: Checking for Physical Damage on Your RAM
Physical damage to your RAM can cause severe issues and result from mishandling, overheating, or electrical damage. To check for physical damage, follow these steps:
Step 1: Turn off your computer and disconnect all cables and power sources.
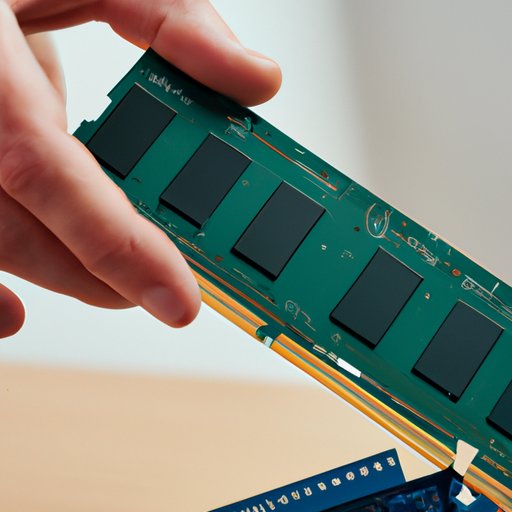
Step 2: Locate your RAM modules on your computer’s motherboard.
Step 3: Remove the RAM modules carefully and inspect them for physical damage, including burn marks, cracks, or bent pins.
Step 4: Clean the RAM modules and the RAM slots to ensure optimal performance.
If you detect physical damage, try replacing the RAM module or consult a professional technician.
Visual Inspection: Identifying RAM Slots and Checking Your RAM
Different computers may have different types of RAM slots, including DDR, DDR2, DDR3, and DDR4. To identify your RAM slots and check your RAM manually, follow these steps:
Step 1: Turn off your computer and disconnect all cables and power sources.
Step 2: Locate your RAM slots on your computer’s motherboard.
Step 3: Remove the RAM modules carefully and inspect them for any visible issues or dirt.
Step 4: Reinsert the clean RAM modules correctly into their designated slots, making sure the notches align correctly.
If you encounter any resistance or difficulties, consult your computer’s manual or contact a professional technician.
BIOS Test: Running a RAM Test Using the System BIOS
The System BIOS (Basic Input/Output System) allows users to perform tests and diagnostics on their computer’s hardware, including RAM. Here’s how to run a RAM test using the system BIOS:
Step 1: Restart your computer and press the appropriate key to enter the System BIOS (usually F2 or Del).
Step 2: Navigate to the “Memory” or “RAM” section using the arrow keys.
Step 3: Choose the “Memory Test” option and start the test.
The BIOS RAM test may take several minutes to complete and provide detailed results indicating any memory problems found. If any issues get detected, try replacing your RAM or contact a professional technician.
Stress Testing: Using Heavy Software to Check Your RAM’s Performance Under Pressure
Stress testing involves running heavy software that consumes high amounts of RAM and CPU capacity to simulate a workload similar to running several programs simultaneously. Stress testing can help identify potential RAM problems under heavy load. Here are some examples of software that can perform stress testing on your RAM:
Prime95: This software is a popular tool for stress testing CPUs and RAM on Windows computers. It can also detect errors in cache and memory subsystems. You can download it for free from their official website.
Memtest86+: This software can also perform stress testing in addition to its diagnostic capabilities.
After the stress test is complete, check the results for any errors or warnings that indicate a RAM problem.
Conclusion
In conclusion, checking your computer’s RAM is an essential step in maintaining its performance and preventing potential issues and data loss. We have explored various methods and tools for checking RAM, including built-in Windows utilities, third-party software, diagnostic tools, manual and visual inspection, BIOS testing, and stress testing. Always remember to handle your RAM with care, keep your computer clean and dust-free, and order RAM modules from trusted and reputable sources. Following these tips will help ensure your computer’s RAM stays functional and reliable for years to come.


