I. Introduction
Changing a light switch may seem daunting, especially if you’ve never tackled a DIY project before. However, with the right tools and some basic knowledge, you can switch up your switch in no time! In this article, we’ll explore why changing a light switch is important, some reasons why you may need to change it, and a step-by-step guide on how to do it yourself!
A. Importance of Changing a Light Switch
A light switch is an important component of your home’s electrical system. Without it, you wouldn’t be able to turn your lights on or off! However, over time, a light switch can become worn out or damaged, leading to potential safety hazards. It’s crucial to replace a faulty switch to maintain the safety and functionality of your home’s electrical system.
B. Possible Reasons for Changing a Light Switch
There are various reasons why you may need to change a light switch. Perhaps the switch is cracked or broken, it’s not working properly, or you want to update to a more modern switch. Whatever the reason may be, changing a light switch is a simple fix that can make a big difference in your home.
C. Brief Overview of What the Article Entails
In this article, we’ll provide a step-by-step guide on how to change a light switch. We’ll start with the basics of turning off the power and removing the old switch, followed by preparing and wiring the new switch. We’ll then show you how to position the new switch and restore power. Additionally, we’ll provide tips for beginners on DIY electrical work, how to save money while changing a switch, and practical tricks for success.
II. Step-by-Step Guide to Changing a Light Switch
Let’s dive into the step-by-step guide for changing a light switch. Remember to always put safety first and turn off the power before beginning!
A. Turning Off the Power
The first step is to turn off the power. Locate your home’s main electrical panel and turn off the circuit breaker that controls the power to the light switch you’ll be working on. If you’re unsure which breaker to turn off, you can flip the light switch and see which breaker switch moves. Be sure to use a voltage tester to double-check that there’s no power running to the light switch before proceeding.
B. Removing the Old Switch
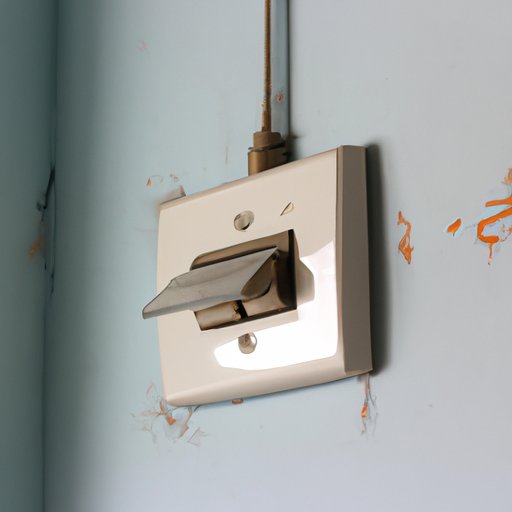
Next, you’ll need to remove the old switch. Use a flathead screwdriver to remove the cover plate, then use a Phillips head screwdriver to remove the screws that hold the switch in place. Carefully pull the switch out from the wall, being mindful of any wires that may be attached.
C. Preparing the New Switch
Take your new switch out of the packaging and inspect it to ensure all the components are there and there are no damages. Make sure the switch is the correct type (single-pole, three-way, etc.) for the circuit. If you’re unsure, consult a professional electrician.
D. Wiring the New Switch
Before wiring the new switch, take a picture or make a sketch of the wiring on the old switch. This will help you remember where the wires should be attached on the new switch. Remove the wires from the old switch and attach them to the corresponding terminals on the new switch. It’s important to make sure the wires are securely attached and no bare wire is exposed.
E. Positioning the New Switch
Once your new switch is wired, carefully push it back into the wall, being mindful of any wires. Use the screws that came with your new switch to secure it in place. Make sure the switch is securely fastened, but not too tight that it damages the wall or switch.
F. Restoring Power
The final step is to restore power. Double-check that the circuit breaker is still turned off, then turn it back on. Flip the light switch to test if it’s working correctly. If the light switch isn’t working, turn off the power and double-check your wiring.
III. The Beginner’s Guide to DIY Electrical Work: How to Change a Light Switch
A. Importance of Safety
When it comes to DIY electrical work, safety should always be your top priority. Never attempt electrical work if you’re unsure or inexperienced, and always wear protective gear, such as safety glasses and gloves. Make sure you turn off the power before starting any electrical work, and use a voltage tester to double-check there’s no power flowing to the area.
B. Understanding the Basics of Electricity
Before you start changing a light switch, it’s important to understand the basics of electricity. Know the difference between volts, amps, and ohms, and understand how electrical circuits work. This knowledge can help you in any future electrical work you may do.
C. Tools Needed for the Job
To change a light switch, you’ll need a few tools, including a flathead screwdriver, a Phillips head screwdriver, wire strippers, and a voltage tester. It’s also recommended to have pliers and a wire cutter on hand.
D. Step-by-Step Instructions for Changing a Switch While Being Safe
Refer to the previous step-by-step guide for detailed instructions on how to change a light switch safely. Remember to always turn off the power, follow proper wiring guidelines, and restore power only after you’ve double-checked everything.
IV. Save Money and Time: How to Easily Change a Light Switch
A. Exploring the Cost of Hiring an Electrician
If you were to hire an electrician to change a light switch for you, you could expect to pay a minimum of $50 in labor fees. Additional fees may apply if the switch is in a hard-to-reach area or if additional electrical work is required.
B. Advantages of Saving Money and Time by Doing it Yourself
By changing a light switch yourself, you can save money and time. You won’t have to pay for labor fees, and you won’t have to wait for an electrician to be available. Additionally, DIY projects can be a great way to learn new skills and gain confidence in your ability to tackle future home improvement tasks.
C. Tips on How to Save Money While Changing a Light Switch
To save money while changing a light switch, consider shopping around for the best prices on materials. Additionally, try to complete the project during regular business hours to avoid any emergency fees. Lastly, as with any DIY project, don’t rush and take your time.
V. Switch it Up: A Quick & Simple Guide to Changing Your Light Switch
A. Emphasizing how easy the process is
Changing a light switch is a simple process that can be completed by anyone. By following the step-by-step guide above, you’ll have your light switch changed in no time! Don’t be intimated by DIY electrical work – it can be easier than you think.
B. Summary of the Step-by-Step Guide to Changing a Light Switch
Refer to the step-by-step guide above for a detailed summary of how to change a light switch. Remember to turn off the power before starting, wire the new switch correctly, and restore power only after double-checking everything.
VI. DIY 101: Changing a Light Switch Made Easy
A. Practical and Easy to Use Guide for Beginners
This article is designed to be a practical and easy-to-use guide for beginners. By breaking down the process of changing a light switch into simple steps, anyone can learn how to do it themselves. Don’t be afraid to try – DIY can be a rewarding experience.
B. Tips and Tricks for Success
To ensure your success in changing a light switch, follow these tips: turn off the power, take a picture or sketch of the wiring, double-check your wiring, and restore power only after everything is double-checked.
VII. From Old to New: How to Replace Your Light Switch in 5 Easy Steps
A. Giving a Brief Overview of Each of the Steps
To replace your light switch, follow these five easy steps: turn off the power, remove the old switch, prepare the new switch, wire the new switch, and position the new switch. Don’t forget to restore power once you’ve double-checked everything!
B. Concise and Easy to Consume Guide for Beginners
This article is designed to be a concise and easy-to-consume guide for beginners. By breaking down the process of changing a light switch into five simple steps, we’ve made it easy for anyone to learn how to do it themselves.
VIII. Conclusion
A. Recap of the Importance of Changing a Light Switch
Changing a light switch is important for maintaining the safety and functionality of your home’s electrical system. Don’t ignore a faulty or damaged switch – replace it as soon as possible!
B. Recap of the Benefits of Doing it Yourself
By changing a light switch yourself, you can save money and time, gain confidence in your DIY skills, and avoid emergency fees. Additionally, DIY projects can be a fun and rewarding experience.
C. Encouragement for the Reader to Give it a Try
We hope this article has encouraged you to try changing a light switch yourself. Remember to put safety first, take your time, and don’t be intimidated by DIY electrical work.


