Introduction
Is your bathtub in need of a little TLC? The solution may be as simple as reapplying the caulking. Without proper caulking, water can seep in between the tub and the wall, causing structural damage and potentially leading to mold and mildew growth. In this article, we will provide you with a step-by-step guide to help you on how to caulk a bathtub. We will also cover tips and tricks, common mistakes to avoid, how often to caulk, and different types of caulking materials to help you ensure a clean, professional-looking job.
Step-by-Step Guide to Caulking Your Bathtub
The first step in any successful caulking job is to gather the tools you will need. You will need a caulk gun, a tube of caulk, a utility knife, a putty knife, and rubbing alcohol or white vinegar.
1. Clean surfaces: The surfaces being caulked must be free of dust and debris. Clean with rubbing alcohol or white vinegar. Ensure the surfaces are completely dry before caulking.
2. Cut the tip of the caulk tube: Cut the tip of the tube at a 45-degree angle, ensuring the opening is the size of the gap being filled.
3. Apply caulk: Hold the caulk gun at a 45-degree angle. Slowly and consistently apply the caulk in a continuous and even bead. Avoid stopping and starting.
4. Smooth the caulk line: With a putty knife or your finger at a 45-degree angle and slightly damp, smooth the caulk line, making sure it is even and straight.
5. Let it dry: Leave the caulk to dry for at least 24 hours before using the bathtub.
Tips and Tricks to Get a Perfect Caulk Job
Choosing the right caulk material is important for achieving a perfect job. Consider the humidity levels, flexibility, and durability needed for your bathroom environment.
Use painter’s tape along the edges of the gap to ensure a straight line. Remove the tape immediately after smoothing the caulk.
Use a caulk smoothing tool or a spoon to create a perfect, uniform, and professional-looking bead.
For larger gaps, use backer rod to fill the space before applying the caulk.
Common Mistakes to Avoid When Caulking a Bathtub
One of the most common mistakes when caulking a bathtub is not cleaning the surfaces well enough. Dirt, grime, and soap residue must all be removed to ensure the caulk adheres correctly.
Another common mistake is using the wrong type of caulk. Choosing a caulk that is not meant for a bathroom environment will result in quick deterioration and the need for more frequent re-caulking.
Avoid overfilling gaps. Apply too much caulk and it will be difficult to create straight lines and remove the excess.
How Often Should You Caulk Your Bathtub?
The lifespan of a caulk job is around 5-10 years. Factors such as wear and tear, humidity levels, and ventilation will affect its longevity. Regularly inspect the caulk and look out for signs of cracking, peeling, or mold. If you notice any of these, it’s time for a new application.
Different Types of Caulking Materials Available
When choosing a caulk material for your bathtub, use one specifically designed for bathrooms and water exposure. There are different types available, including silicone, acrylic, and latex.
Silicone is flexible and long-lasting, making it ideal for high-moisture areas. Acrylic is easy to use and paintable, making it a good option for those who want to change the color of their bathroom. Latex is affordable and easy to clean, but may not be as long-lasting as other options.
Best Practices for Removing Old Caulk
Removing old caulk is necessary before applying a new layer. Use a utility knife to carefully remove the caulk without damaging the bathtub. A caulk removal tool and a heat gun can also make the process easier.
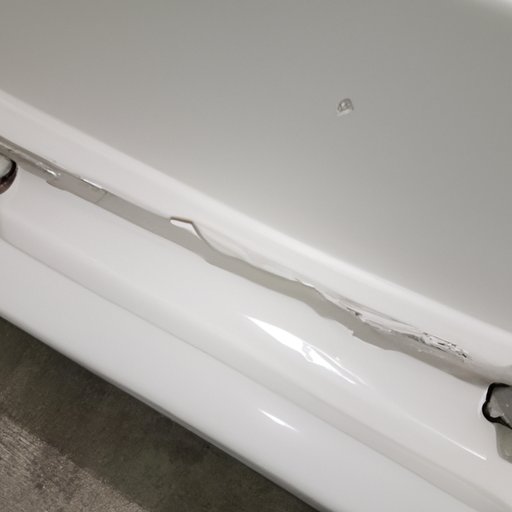
How to Fix a Bad Caulk Job
If you notice a bad caulk job, it’s best to remove the old caulk and start again. However, if you are only dealing with minor issues, such as small gaps or uneven lines, you can repair the problem areas without redoing the entire job.
Conclusion
A properly caulked bathtub will not only protect the surround from water damage but also make your bathroom look neat and professional. Follow our step-by-step guide, tips, and tricks, and be vigilant when it comes to inspecting your caulk job. As with any DIY project, take your time, and remember, if in doubt, seek professional help.


