I. Introduction
Canning pears is a great way to enjoy this delicious fruit all year round. Not only does it offer convenience and access to fresh produce throughout the year, but it also preserves the nutritional benefits that pears offer, providing a healthy snack option as well. In this article, we’ll cover everything you need to know about canning pears, from the ingredients and tools required to safety precautions, step-by-step instructions, and recipe collections using canned pears. We will also discuss the history and health benefits of canned pears.
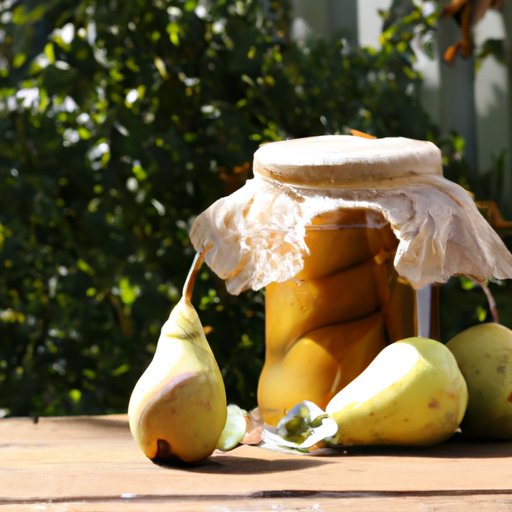
II. Step-by-Step Guide to Canning Pears
Before you start canning, you’ll need a few ingredients and tools, including:
- Fresh pears
- Canning jars and lids
- Hot water bath canner or pressure canner
- Lemon Juice
- Sugar
- Cinnamon sticks and cloves (optional)
If you’re new to canning, make sure to read up on safety precautions to prevent any injuries. It’s important to sterilize the jars and lids before starting to reduce the risk of contamination and spoilage. Once you’ve prepared the jars and lids, follow these steps:
- Begin by peeling the pears and slicing them into halves or quarters. Remove the seeds and cores.
- Place the pear slices in a large bowl of water and lemon juice for about 10 minutes to prevent browning.
- Bring a pot of water to a boil, then add the pears and let them simmer for about 5 minutes.
- While the pears are simmering, prepare the syrup. Combine sugar and water in a pot and bring to a simmer before stirring to dissolve the sugar. Add cinnamon sticks and cloves (if using).
- Once the pears have simmered for 5 minutes, remove them from the pot and transfer them to the jars, filling them about ¾ of the way full.
- Drizzle the syrup over the pears, leaving about ½ inch of headspace. Ensure that each jar has enough syrup to cover the pears completely.
- Remove air bubbles from the jars by running a spatula or butter knife around the edges. Wipe the rims of the jars and add the lids and rings, ensuring they’re secure but not too tight.
- Place the jars in either a hot water bath canner or a pressure canner and process them according to the manufacturer’s instructions. For a water bath canner, allow 15 minutes for pints and 20 minutes for quarts at a temperature of 212°F. For a pressure canner, you’ll need to process at 10lbs of pressure for 10 minutes (pints) or 15 minutes (quarts).
III. Recipe Collection Using Canned Pears
Once you’ve canned your pears, it’s time to start enjoying them! There are many different delicious recipes that you can make with canned pears, such as:
- Pear tart or pie
- Pear butter or jam
- Spiced pear chutney
- Granola with canned pears and yogurt
- Caramelized pear and brie crostini
Using canned pears in these recipes will not only add flavor and nutrition but also save you time in the kitchen. Before using canned pears in recipes, make sure to drain them and pat them dry.
IV. Canning Tips and Tricks
To ensure a successful canning experience, it’s important to follow correct procedures. Some common mistakes to avoid include:
- Not using enough sugar syrup, which can result in not sealing the jars properly and increased the likelihood of spoilage
- Using overripe or underripe pears that may spoil or not have the right texture after canning
- Not properly sterilizing the jars or tools, which can lead to contamination and spoilage
When it comes to selecting the right type of pear for canning, the best choices are firm and slightly underripe varieties like the Bartlett or Bosc pears. These types work well for both water bath and pressure canning and have a long shelf life.
After canning, make sure to store your pears in a cool, dry place, away from light. Canned pears will typically last for up to 2 years when stored correctly.
V. History of Canning Pears
Canning has been used to preserve food for centuries. The first recorded canning process was used by Nicolas Appert in France in the late 1700s, and it wasn’t until the early 1800s that canning began to be used in America.
Pears have been a popular fruit to can since the early 1900s, due to their abundance and low cost. While the process of canning pears has evolved over time, the basic principles remain the same. Today, canning is a popular hobby and not just for preserving food but also for its therapeutic and creative benefits.
VI. Health Benefits of Canned Pears
Pears are an excellent source of fiber, potassium, and vitamin C. Canned pears retain most of these nutrients and can provide an immunity boost and increase energy levels. They’re also known for helping digestion and providing relief in constipation. Moreover, canned pears are a convenient and tasty way to incorporate more fruit into your diet year-round.
VII. Conclusion
In conclusion, canning pears is a fun and wholesome way to enjoy this delicious fruit at any time of the year. From the history of pear canning to recipe collections using canned pears, we’ve covered everything you need to know. With the right tools, ingredients, and safety precautions, you can enjoy canned pears all year round, and savor the taste of this tasty fruit in various dishes. Remember to store your canned pears correctly and follow correct procedures for safe and successful canning.


