Introduction
Do you love applesauce but hate the synthetic taste that often comes with store-bought varieties? Would you like to eat homemade applesauce anytime you want to, even when it’s not apple season? Canning applesauce is the answer! In this article, we will explore a foolproof method for canning applesauce. You’ll keep cans of delicious, healthy applesauce all year round with no preservatives and only natural ingredients.
Step-by-step guide
A. Preparing the apples
Before starting the canning process, it’s important to prep the apples properly. Here are the steps you need to follow:
1. Selection of apples
The first step in apple preparation is to choose the right variety of apple. Selecting the right apples for your sauce is essential for getting the perfect texture and taste. A lot of people like to create a more complex sauce by using a blend of apple varieties. The most commonly used apples are sweet varieties such as Honeycrisp, Golden Delicious, and Rome. However, feel free to play around with different types.
2. Washing apples
After the apples are chosen, wash them thoroughly in cool water to remove any dirt or debris.
3. Peeling and coring the apples
You can peel and core the apples by using a sharp knife or an apple peeler-corer-slicer machine. Cut the apples in small cubes, removing the cores, and seeds.
B. Making applesauce
Making the applesauce is broken down into three easy steps: cooking the apples, adding sweeteners, and mashing the apples.
1. Cooking the apples
Add the apple cubes to a big pot. Pour about 1/4 cup of water or apple cider onto them and cook over medium heat. Stir the ingredients often to avoid browning or scorching until the fruit is tender, which takes around 15 minutes.
2. Adding sweeteners
Once your apples are cooked, it’s time to add sweeteners like cinnamon, caramel, honey, sugar, maple syrup, or any other flavorings, depending on your preference. Be sure to add enough to suit your taste.
3. Mashing the apples
You can use an immersion blender or food processor to get a smoother consistency. Make sure that applesauce is completely smooth. This is as simple as that!
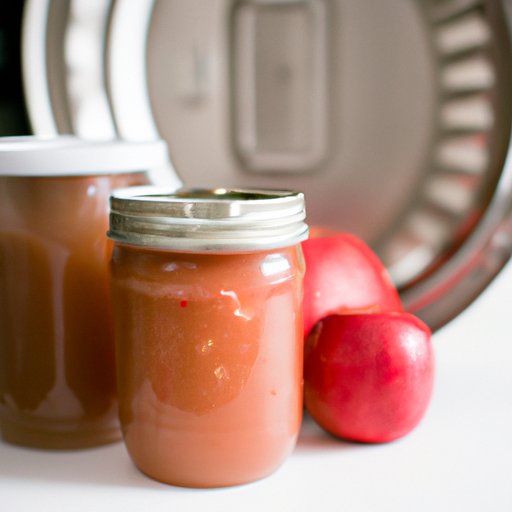
C. Canning the applesauce
After you’ve prepped and made your applesauce, it’s time to put them into jars.
1. Sterilizing the jars
Clean the jars and lids by boiling them in a pot of water for five minutes. Use a jar lifter to remove the jars from the boiling water to ensure that they don’t break.
2. Filling the jars
Fill your jars with hot applesauce, leaving some space at the top. Use a funnel to minimize the mess and prevent the applesauce from sticking to the rim of the jar or getting air bubbles.
3. Processing/canning the jars
Put on the lids and screw the bands on firmly. After that, submerge the jars in boiling water covering them completely for up to 15 minutes depending on what altitude you live in. Remove the jars from the water, allowing them to cool on a dry towel. After the jars have cooled, check the lids for a proper seal.
D. Finishing touches
Congratulations! You have successfully canned your applesauce. But before your applesauce can be safely kept in your pantry, you must execute these finishing touches:
1. Cooling the jars
After you’ve processed the jars, allow them to cool down naturally on a kitchen towel for 24 hours without moving or disturbing them.
2. Labeling and storing the jars
After cooling down, you can label your jars with apple sauce and date and store your jars in a cool, dry, dark place.
Equipment needed
A. Overview of equipment required
The great news is that most of the equipment required to can applesauce is relatively inexpensive and accessible. Most of the things you’ll need are probably already in your kitchen.
B. Where to purchase equipment
However, if you are missing some equipment, you can easily buy them at grocery stores, online, or at kitchen utility stores.
C. Detailed instruction on how to properly use each item
Here is the equipment you need and detailed instructions for how to use each item:
- Jars: A canning jar with a two-piece lid is best for canning applesauce, but a Mason jar, or even recycled jars, can also work. Ensure that you examine the jars carefully for any scratches or cracks, and sterilize them before using them for the first time.
- Canner: You may use any deep pot to boil the jars, or you can buy a canner specially made for water-bath processing.
- Water: You’ll need plenty of clean water to process your applesauce, sterilize your jars, and clean your utensils.
- Funnel: A funnel is a handy tool to aid filling the jars. If you don’t have a canning funnel, a regular large funnel will suffice.
- Jar Lifter: This tool is ideal for lifting hot jars out of boiling water and placing them onto the countertop.
- Bowls: You will need sterile bowls for preparing and holding the ingredients – two should suffice.
- Utensils: Spoons for stirring and ladling are necessary.
- Sweeteners: You can use your preferred sweeteners to customize the recipe to your taste.
- Cooking utensils: You’ll need a sharp knife, apple peeler, food processor or immersion blender, and a big pot to cook up your applesauce.
Canning Tips
A. Introduction and importance of canning tips
Canning tips center around safety, and proper canning inhibits the development of bacteria that cause food poisoning. Here are some useful tips to get you started:
B. Cooking applesauce tips
- Cook your apples slowly to retain their natural color and flavor.
- Be patient with the cooking process to achieve the best texture.
- Be cautious with spices to avoid overpowering the natural tast of apples.
C. Sterilizing jars tips
- Before filling them, sterilize your jars to avoid contamination and foodborne illnesses.
- Clean your jars thoroughly before use to prevent any dirt from getting inside them.
- Remember to examine the jars carefully for any cracks or scratches. If you find any, don’t use them as they are likely to break.
D. Safely storing the finished product tips
- Be sure to label your jars to ensure you know exactly how much time has passed since you’ve canned them.
- Store your jars safely in a cool, dark place.
- Only keep your applesauce for a maximum of 12 months.
Different Recipes
A. Explanation of the need for different recipes
The beauty of applesauce is how easy it is to make changes to the recipe. Here are some recipe variations to get you started:
B. Recipe for different flavors of applesauce
- Cinnamon: 1 tsp of cinnamon in addition to your recipe
- Pumpkin Pie: ¼ cup of pumpkin spice and 1/8 cup of brown sugar in addition to the applesauce recipe.
- Gingerbread spice: 2 tsp of ginger and 2 tsp of cinnamon in addition to the applesauce recipe.
C. Recipes that use different types of sweeteners
- Honey: 1/2 cup of honey in addition to the usual apple sauce recipe.
- Maple syrup: swap out the sugar for an equal amount of maple syrup.
- Agave Nectar: 1/2 cup of Agave nectar is a healthy sweetener option to add to your recipe.
Troubleshooting
A. Introduction and importance of troubleshooting
Making applesauce with the canning method is a pretty easy affair. However, sometimes, issues can arise. Here are a few tips to help you through any unscheduled blips:
B. Tips to prevent mold formation
- Always follow the correct processing time.
- Wash your fruits thoroughly.
- Wipe off any foreign objects or mold growth on your fruits.
C. Tips on sealing jars
- Ensure the jars and lids are clean and free from damage.
- Make sure that the rims of the jar are free of food or residue.
- Be sure to tighten the bands on your jars firmly, but not too tight
D. Tips for preventing jars from breaking during the canning process
- Thoroughly warm up your jars before you start canning.
- Don’t use damaged jars.
- Make sure that the jars and lids are clean before use.
Storytelling
A. Brief history of canning applesauce
Canning applesauce has been a popular way of preserving the tart fruit for more than a hundred years. Initially, people commonly used various techniques to preserve applesauce, such as using other fruits, drying, and salting. Canning had rapidly grown in popularity, even though it was a tricky business with an amateur.
B. Evolution of canning process
During World War II, canning experienced something of an evolution with housewives playing an important part in the conservation of food. The pressure canning method came to the forefront at this time and was much better at preventing spoilage and ensuring safe consumption. Today, home canning remains a popular method of preserving a garden or fruit harvest and is much simpler with the help of the internet.
C. Conclusion
Canning applesauce for home preservation is pretty simple and enjoyable than it is commonly believed. Preparing, sterilizing, canning, and storing keep the fruit sauce fresh for the family to enjoy. Not only is it tasty, but it’s also healthy to enjoy. Derive pleasure from the fruits of your labor by canning your delicious applesauce!
Conclusion
We’ve covered everything you need to know about canning applesauce, from essential equipment to the proper steps. With this guide, you can look forward to delicious homemade applesauce without preservatives, all year round. Experiment with different recipes and sweeteners to create the perfect product for your taste.


