I. Introduction
Building a paper airplane may seem like a simple childhood pastime. However, it is a craft that requires skill, patience, and attention to detail to produce a successful model. It is not only an enjoyable hobby, but also an excellent way to learn about the principles of flight and the laws of physics. This guide will walk you through the process of building and designing paper airplanes, as well as provide tips on how to fly them correctly. Whether you want to build a classic paper airplane or design a complex model, this guide has everything you need to perfect the art of paper flight.
II. Step-by-Step Guide: How to Build a Classic Paper Airplane
Before diving into more complex designs, it is essential to master the basic steps of building a paper airplane. To make a classic paper airplane, you will need a sheet of paper. Any standard letter-sized paper will work. The folds and technique used in this guide result in a classic model that can fly a far distance when thrown correctly. Follow the steps below to build your classic paper airplane:
- Start by laying the paper face down on a flat surface.
- Fold the top right corner of the paper diagonally to the bottom edge of the paper and crease the fold.
- Repeat the previous step with the top left corner of the paper, folding it diagonally to the bottom edge and crease the fold.
- Take the top edge of the paper and fold it down to the bottom edge, creating a horizontal center fold. Crease the fold, then unfold the paper.
- Using the creases as a guide, fold the top right corner of the paper towards the center crease. Repeat this step on the left side of the paper. The two folds should meet at the center crease.
- Take the top of the paper and fold it down along the center crease, tucking the top edge underneath the flaps created in the previous step. Crease the fold well.
- Turn the paper over and fold the wings down at a slight angle from the center crease. The distance from the bottom edge of the paper to the wings’ top edge should be approximately one-third of the paper’s total length.
- The final step is to create the wing flaps. Fold the wings up along the bottom edge of the paper and crease the fold.
- Flip the paper over and repeat the previous step on the other side to complete the classic paper airplane design.
Once completed, test your airplane by throwing it a few times and adjust the wings or folds for better flight. Remember, practice makes perfect, and the more you throw your paper plane, the more you will learn about its flight characteristics.
III. Taking Flight: Creative Designs for Paper Planes
Once you have mastered the classic model, it is time to expand your design skills and create a unique paper airplane. With creativity and a little experimentation, it is possible to construct a model that suits your preference and fly remarkably. In this section, we will explore different ways to design a custom paper airplane that will leave your friends and family in awe. Some of the design features that you can incorporate into your custom model include:
- Wider wingspan to achieve a longer flight
- Making sharper angles for a faster and more precise throw
- Add fins or rudders to better stabilize the airplane in flight
- Adding tails or paper flaps to create both lift and drag to increase flight time
- Designing a front nose with added paper weight for better balance and stability.
Modifications like these alter the flight characteristics of a paper plane. Therefore, it is beneficial to test-fly your designs before concluding on the final choice. Trial and error are essential to develop a paper airplane design that suits your liking. Below are some examples of unique and creative designs that you can try out:
- Jet Planes
- Bat Planes
- Aerobatic Planes
- Glider Planes
- Bird Planes
It’s essential to keep in mind that designing custom models is an ongoing learning experience. The process of testing and adapting results in a piece of engineering that can exceed one’s initial expectations.
IV. Paper Plane Pointers: Tips and Techniques for Optimal Flight
Adjusting and refining the details of your paper airplane is just as crucial as the actual design itself. By optimizing the airplane for flight probability, the distance it can travel increases dramatically. This section provides helpful tips to improve the overall flight capacity of your paper airplanes. By adjusting the weight distribution, the wing angles, and the nose shape of a paper plane, one can improve its flight capacity and endurance. Below are insights into proper flight techniques:
- Hold the paper airplane behind the wings at shoulder height
- Give the plane a smooth, fast throw
- Launch the plane at a slight upward angle
- Adjust the wing flaps by bending them up or down, then fine-tune them as required by flight performance
Also, consider experimenting with different paper sizes and weights, as it can dramatically affect the flight distance and pattern. Assembling the airplane with a wind-resistant paper will also increase its flight capacity. Additionally, practice flying the airplane in different weather or wind conditions to improve the ability to maneuver and stabilize the airplane. Finally, keep in mind that the more details and refinements one makes to an airplane, the higher the chance it becomes more delicate and easier to destroy.
V. Origami for Beginners: Crafting a Paper Airplane from Scratch
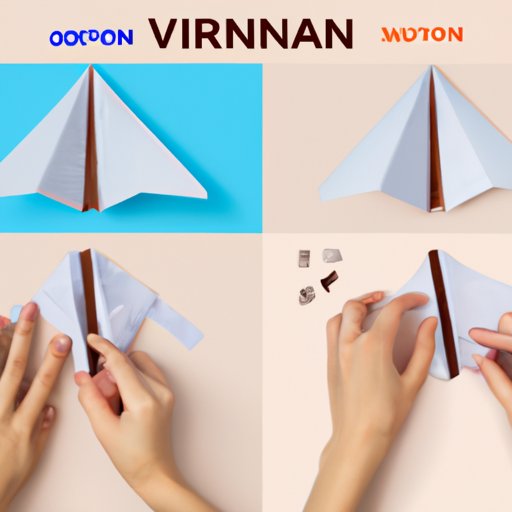
If one has never used origami before, it can seem daunting to incorporate these techniques into a paper airplane model. By using origami, however, the paper airplane’s detail and aesthetics increase dramatically. Below are steps to build a paper airplane using origami techniques:
- Fold the paper in half diagonally, crease it, and unfold it.
- Next, take the uppermost layer of paper from both sides and fold it towards the middle crease.
- Flip the paper over, then take the top edge of the paper and fold it downwards towards the cross of the first two folds. This will create a triangle shape in the upper portion of the airplane
- Take each wing and gently fold it up along the edge of the triangle until it forms a straight line.
- Gently pull the triangular flaps down to create the nose of the paper airplane.
- Now, fold the wings down diagonally to create the wingtips’ angles.
- The final step is to shape the wings by gently curling them slightly up at the tips, creating the perfect airplane shape.
Using Origami techniques improve the overall symmetry of the airplane design and perfect the overall aesthetics. It requires a higher level of skill, precision, and patience, making it a more challenging but satisfying task.
VI. Make Your Own Paper Airplane Tracker: Tools and Tricks for Measuring Distance Flown
Tracking and measuring the flight distance and time of your paper airplane creations can be just as rewarding as building them. Having the ability to track the distance and measure the time of the flight is an incredible way to improve flight patterns, make comparisons, and collect valuable data about your designs. In this section, we will discuss different ways to create paper airplane trackers and tips to optimize their usage
- Using a measuring tape to track the distance of the airplane after each throw
- Use a stopwatch to time the duration of the flight of the airplane.
- Measure the height of the flight using a ruler
- Testing your designs with a powerful digital camera or a drone filming the airplane in motion.
With the advances in technology, it is now possible to use GPS-equipped drones or specialized tracking devices that automatically track the distance of paper airplanes. With the right tools and tricks, understanding the flight performance of your paper airplanes are easier than ever.
VII. Growing Your Collection: Building a Fleet of Unique Paper Planes
Building collections of paper airplanes can be an engaging and satisfying process, allowing one to experiment with different designs, styles, and build quality. It facilitates the ability to share creative insights and ideas with other airplane enthusiasts while embracing individual creativity. In this section, we will offer tips on how to build a fleet of airplanes to grow your collection. This tips include:
- Try to experiment with different colors, materials, and patterns for paper airplanes.
- Explore various designs and styles, including commercial airplanes like Boeing or Airbus in other aircraft manufacturers.
- Consider using other crafting materials to enhance the details and aesthetics of your paper airplane collection, such as paints, markers, glitters, and stickers.
- Organize and categorize your collection based on design, complexity, or aesthetics.
- Exchange designs with friends and family or find a community group to showcase and share your collections.
The possibilities for building a unique paper airplane collection are seemingly endless, with infinite customization options. One can experiment endlessly, perfecting their designs and exploring their creativity, to uncover something new along the way.
VIII. The Science of Flight: Exploring the Physics Behind Paper Airplanes
The science of flight and the principles of physics behind how paper airplanes operate are essential to the quality of the airplane’s motion and performance. In this section, we will dive into the fundamentals of flight and intricate paper airplane principles related to aerodynamics, weight, and balance. This section will provide an explanatory background on those fundamental principles that apply to paper airplanes, including:
- The four principles of flight
- The significance of weight distribution and its impact on performance
- The relationship between balance and stability of the airplane
- How factors such as wind, force, pressure, and velocity affect flight.
Understanding the principles of flight and how they apply to paper airplanes is crucial in designing airplanes that fly further, higher, and smoother in flight.
IX. Conclusion
In conclusion, building and flying paper airplanes are an exciting way to explore creativity and learn the principles of flight and physics. From classic airplanes to advanced designs, readers can create unique models with superior flight performance to share with friends and family.
As demonstrated in this guide, even the smallest tweaks to a paper airplane’s design can drastically improve its flight capacity.


