Introduction
Have you ever wanted to achieve a perfect manicure without going to a salon? Do you find it difficult to apply nail polish or extensions yourself? Fear not, because press-on nails are here to save the day! Press-on nails are an easy, affordable, and versatile solution for anyone who wants to achieve flawless nails at home or on the go. In this article, we will provide a complete guide on how to apply press-on nails like a pro, as well as tips and tricks for flawless application, DIY nail art, and nail extensions.
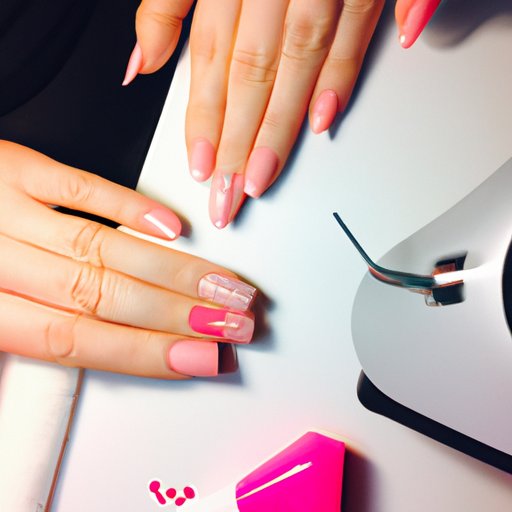
Step-by-Step Guide: How to Apply Press-On Nails Like a Pro
The first step to achieving perfect press-on nails is to prepare your nails. This involves removing any old polish or dirt, pushing back your cuticles, and buffing your nails gently to create a smooth surface. Then, select the right size and style of press-on nails that match your nail shape and length, as well as your personal style. Once you’ve found the perfect nails, follow these simple steps to apply them:
1. Apply a small amount of nail glue or adhesive to your natural nail, making sure not to get any on your skin.
2. Carefully place the press-on nail onto your natural nail, starting from the cuticle and pressing towards the tip of your finger.
3. Hold the press-on nail in place for about 10-15 seconds to allow the glue to dry and secure it firmly to your natural nail.
4. Repeat the process for all of your nails, making sure to press firmly and evenly to avoid any air bubbles or lifting.
5. Once all the nails are applied, file and shape them to your desired length and shape, and add a top coat or nail polish if desired.
Remember to take your time and be patient, as a rushed application can lead to uneven or unsightly nails.
Tips and Tricks: The Ultimate Guide to Applying Press-On Nails Flawlessly
If you want to take your press-on nail game to the next level, here are some advanced tips and tricks that can help you achieve flawless nails:
– Use different types of glue or adhesive depending on your nail type and style preference. Some people prefer nail glue, while others prefer adhesive strips or tabs. Experiment with different options to find what works best for you.
– Shape and file your nails before applying the press-on nails to create a smooth surface and prevent any rough edges or snagging.
– Try adding some finishing touches to your press-on nails, such as glitter, decals, or stickers, to personalize your look and make it stand out.
– Don’t be afraid to mix and match different textures, colors, and styles of press-on nails to create your own unique nail designs and combinations.
If you encounter any common problems, such as air bubbles, lifting, or uneven application, don’t panic. There are easy solutions for each of these issues, such as gently lifting and reapplying the nail, pressing it firmly again, or using a small brush to apply more glue or adhesive where needed.
Beginner’s Guide: A Simple Breakdown of How to Apply Press-On Nails
If you’re new to press-on nails or find the previous section too overwhelming, here’s a simple step-by-step guide that can help you achieve beautiful nails:
1. Prep your nails by cleaning and buffing them gently.
2. Select the right size and style of press-on nails.
3. Apply a small amount of glue or adhesive to your natural nail.
4. Carefully place the press-on nail onto your natural nail, starting from the cuticle and pressing towards the tip of your finger.
5. Hold the press-on nail in place for about 10-15 seconds to allow the glue to dry and secure it firmly to your natural nail.
6. File and shape the nails to your desired length and shape.
Remember to avoid applying the nails too close to the cuticles or not pressing them firmly enough, as this can cause lifting or unevenness.
Quick and Easy Nail Application: How to Use Press-On Nails for a Beautiful Manicure
Press-on nails are a versatile and convenient solution for any occasion or style. Whether you’re going to a wedding, party, or simply want to spice up your everyday look, press-on nails can help you achieve a professional-looking manicure in no time. Some tips to keep in mind:
– Coordinate the color and style of your press-on nails with your outfit and accessories to create a cohesive look.
– Consider using press-on nails with different shapes or textures, such as stiletto, square, or matte, to add some variety and personality to your nails.
– Don’t forget to pack some extra glue or adhesive with you in case of emergencies or touch-ups.
DIY Nail Art Made Simple: How to Apply Press-On Nails for a Fun Look
Press-on nails are not just for basic manicures; you can also use them to create your own unique and fun nail art designs. Here are some inspiration and tips to get you started:
– Try creating different patterns or gradients using two or more colors of press-on nails, or layering them with nail polish or glitter for a more complex look.
– Use decals, stickers, or gems to add some bling or personality to your nails, such as creating floral or geometric shapes.
– Don’t forget to experiment with different shapes and lengths of press-on nails to create a more dramatic effect, such as using longer pointy nails for a witch-themed look.
No Salon Appointment Necessary: How to Achieve a Perfect Nail Extension with Press-On Nails
If you’re looking for a cheaper and less time-consuming alternative to nail extensions or acrylics, press-on nails can also help you achieve the same length and shape. Here are some tips and tricks to follow:
– Choose press-on nails that are long and narrow enough to fit your natural nails, and file them gently to shape them into a pointed or oval shape.
– Apply the press-on nails as usual, but make sure to press them firmly and evenly onto your natural nails to create a seamless and natural-looking extension.
– Finally, shape and file the nails to the desired length and shape, and add some nail polish or glitter to finish the look.
Remember to remove the press-on nails carefully and safely to avoid damaging your natural nails, as well as giving your nails a break between uses.
Conclusion
Press-on nails are a simple, affordable, and versatile solution for anyone who wants to achieve perfect nail looks at home or on the go. By following our step-by-step guide, tips and tricks, and beginner’s guide, you can become a pro at applying press-on nails and experiment with different styles and nail art designs. Whether you’re looking for a quick and easy manicure, DIY inspiration, or nail extension alternative, press-on nails have got you covered.


