I. Introduction
A Keurig coffee maker is a convenient and reliable machine that brews a cup of coffee in seconds. However, over time, your coffee maker will build up mineral deposits from the water, which can lead to clogs and other issues. That’s why it’s important to descale your Keurig machine regularly.
This article will guide you through the process of descaling your Keurig coffee maker, provide tips for prepping and cleaning up the machine, and offer troubleshooting solutions for common issues. Whether you’re a seasoned Keurig owner or a beginner, you’ll find helpful information in this guide to keep your coffee maker in excellent condition.
II. The Ultimate Guide to Descaling Your Keurig Coffee Maker: A Step-by-Step Tutorial
To successfully descale your Keurig coffee maker, follow these simple steps:
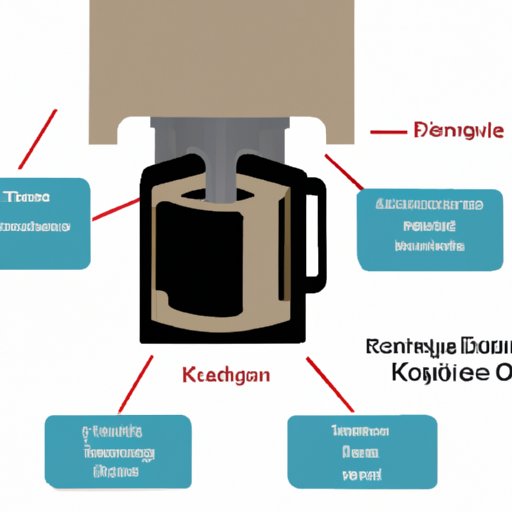
- Empty the water reservoir. Remove any remaining water in your machine by unplugging it and letting it cool off for a few minutes. Then, take out the water reservoir and dump its contents.
- Make the descaling solution. Fill the reservoir halfway with vinegar and the other half with water. If you prefer a commercial descaling solution, follow the manufacturer’s instructions. Don’t forget to use gloves and goggles for protection.
- Run a cycle. Place a mug on the drip tray and turn on your machine. Run the brewing cycle without a K-cup until the coffee maker stops dispensing the solution from the reservoir.
- Repeat the process. Pour the used solution back into the reservoir and run another cycle. Repeat this step until the machine has empty the tank.
- Clean the machine. Once you have completed the descaling process, run a cycle of clean water through your Keurig coffee maker. This ensures that any leftover vinegar is flushed out. Discard the water and repeat if necessary.
- Wipe down the machine. Clean the exterior of your machine with a damp cloth to remove any vinegar or water residue. Also, rinse the water reservoir and drip tray in clean water and dry them with a towel.
Tips for preparing the machine and cleaning up afterwards
Before you begin descaling, make sure that you follow these tips:
- Remove the K-cup from the machine before starting the brewing cycle.
- Use distilled water and white vinegar for the best results.
- Keep a bowl nearby to pour the used solution into, so that it’s easy to dispose of.
- Unplug your machine and let it cool before emptying the water reservoir.
- Rinse the reservoir and drip tray with soapy water and let them dry before putting them back into the machine.
Common mistakes to avoid
Here are some common mistakes you should avoid when descaling your Keurig coffee maker:
- Using bleach or other harsh chemicals to clean your machine.
- Forgetting to rinse the machine with clean water after the descaling process.
- Using tap water instead of distilled water.
- Avoiding the exterior of the machine when cleaning it.
- Not reading the manufacturer’s instructions for using a commercial descaling solution.
III. Why Descaling Your Keurig Coffee Maker is Important and How to Do It Properly
Here’s why descaling your Keurig coffee maker is important and how to do it properly:
Explanation of the problems that can arise from not descaling
If you don’t descale your Keurig machine, it can:
- Reduce the machine’s lifespan by clogging the internal parts.
- Contribute to poor-tasting coffee due to mineral buildup in the system.
- Slow down the brewing process and reduce the machine’s efficiency.
Step-by-step instructions for descaling a Keurig coffee maker
Follow the steps provided on section II of this article.
Tips for choosing the right descaling solution and materials
When it comes to choosing a descaling solution for your Keurig coffee maker, you have a few options. White vinegar is a safe and effective choice for most machines. However, if you prefer a commercial descaling solution, follow the manufacturer’s instructions. You should also consider using distilled water to avoid any mineral buildup in the future.
IV. Let’s Get Brewing: The Simple Guide to Descaling Your Keurig Coffee Maker
If you’re short on time and want to descale your Keurig coffee maker quickly, follow this short and sweet walkthrough:
- Empty the water reservoir and make sure there is no K-cup in the machine.
- Fill the reservoir halfway with white vinegar and halfway with water.
- Turn on your machine and run the brewing cycle without the K-cup.
- Repeat the process until the indicator light signals that the reservoir is empty.
- Run a clean water cycle through the machine to rinse any leftover vinegar.
- Clean the outer parts of the machine with a damp cloth and dry the reservoir and drip tray thoroughly before using them again.
Tips for making the process as quick and easy as possible
To make the descaling process as fast and easy as possible, take note of the following tips:
- Use a descaling solution that works for your machine to get the best results.
- Follow the manufacturer’s instructions for any commercial descaling solution.
- Have white vinegar and distilled water on hand to mix your own solution.
- Don’t forget to run clean water through the machine after descaling to ensure that there is no leftover vinegar or descaler residue.
V. Troubleshooting Your Keurig Coffee Maker: How to Fix Common Problems with Descaling
Common issues that can arise during descaling
Here are some common problems that might arise when descaling your Keurig coffee maker:
- The descaling solution tastes and smells like vinegar.
- The machine clogs during the descaling process.
- The machine doesn’t brew after descaling.
- The machine makes loud or unusual noises after descaling.
Solutions for each problem
To fix each problem, follow these solutions:
- If the solution tastes and smells like vinegar, run additional clean water cycles through the machine until the taste and smell dissipate.
- If the machine clogs during the cycle, use a toothpick or a paper clip to unclog the needle that releases the water. Be careful not to push the wire too far into the needle opening.
- If the machine doesn’t brew after descaling, check the water reservoir and ensure that it’s properly fitted in the machine. You may need to prime the machine by running a few brewing cycles with clean water.
- If the machine makes loud or unusual noises after descaling, check all the parts and components. You may need to reassemble the machine or replace any parts that have become worn out.
Tips for preventing future problems
To prevent future problems, you should regularly descale your Keurig coffee maker every three to six months. You should also use distilled water to reduce mineral buildup in the machine. Additionally, follow the manufacturer’s instructions for cleaning and maintaining your machine.
VI. How Often Should You Descale Your Keurig Coffee Maker? A Guide to Maintenance and Care
Explanation of how frequently Keurig coffee makers should be descaled
Keurig coffee makers should be descaled every three to six months, depending on how often you use your machine and the water hardness in your area. If you notice decreased efficiency or poor-tasting coffee, it’s time to descale your machine.
Tips for maintaining the machine to prevent the need for frequent descaling
To maintain your Keurig coffee maker and prevent the need for frequent descaling, follow these tips:
- Use distilled water to reduce mineral buildup in the machine.
- Clean the machine regularly to prevent clogs and buildup.
- Replace any worn-out parts or components promptly.
- Run a water-only cycle after every cup of coffee to keep the machine clean and ready for the next use.
Common signs that it’s time to descale
You should descale your Keurig coffee maker if you notice any of the following signs:
- Slow brewing time.
- Decreased efficiency.
- Poor-tasting coffee.
- Water not dispensing as quickly as it should.
- Machine clogging frequently.
VII. The Best Keurig Descaling Solutions: Comparing DIY and Commercial Products
If you’re considering descaling your Keurig coffee maker, here’s a comparison between the best DIY and commercial solutions:
Overview of popular descaling solutions
The most popular descaling solutions are white vinegar and commercial descaling solutions. White vinegar is an affordable and readily available solution that works well for most Keurig machines. Commercial descaling solutions are also effective and come pre-measured for easy use.
Advantages and disadvantages of each option
Here are some advantages and disadvantages of each option:
- White vinegar: affordable, readily available, and effective. The only downside is that it has a distinctive smell that some users may not like.
- Commercial descaling solutions: easy to use, pre-measured, and effective. The only disadvantage is that they can be more expensive than vinegar.
Tips for choosing the right solution for your needs
When choosing a descaling solution for your Keurig coffee maker, consider your budget and preferences. If you’re looking for an affordable and accessible solution, white vinegar may be the best option. However, if you prefer a more user-friendly solution, a commercial descaling product may be better. As a rule, use a solution that works for your machine’s specific descaling needs and always read the manufacturer’s instructions.
VIII. Descaling Your Keurig Coffee Maker: FAQs and Expert Answers
Here are some frequently asked questions about descaling Keurig coffee makers:
Answers to common questions about descaling
- Q: Can I use lemon juice instead of vinegar to descale my machine?
- Q: Can I use CLR for descaling my Keurig coffee maker?
- Q: Can I descale my Keurig with baking soda?
- Q: How do I know if my Keurig coffee maker needs descaling?
- Q: How often should I descale my Keurig coffee maker?
A: Lemon juice is not recommended for descaling Keurig coffee makers because it doesn’t contain enough citric acid to be effective. You may use commercial descaling products that contain citric acid if you prefer.
A: CLR or any other harsh chemical cleaners should not be used for Keurig coffee makers because they can damage the plastic and rubber components of your machine. You may use white vinegar or a commercial descaling solution instead.
A: Baking soda is not recommended for descaling because it doesn’t contain any citric acid. If you prefer DIY solutions, use white vinegar instead.
A: If your machine is running slowly or brewing poor-tasting coffee, it’s time to descale your Keurig coffee maker.
A: You should descale your Keurig coffee maker every three to six months or when you notice signs that your machine needs descaling.
Tips from experts and experienced Keurig coffee maker owners
Here are some tips from experts and seasoned Keurig owners:
- Choose a descaling solution that is compatible with your machine. Consult your machine’s user manual for more information.
- Regular cleaning and maintenance can prolong your machine’s lifespan and prevent the need for frequent descaling.
- Using distilled water instead of tap water can reduce the risk of mineral buildup in your machine.
- Always read the manufacturer’s instructions for any commercial descaling product.


