Can You Wallpaper Over Wallpaper?
If you are looking to update the look of your space, wallpapering is an easy, affordable, and customizable solution. It can add texture, color, and personality to your room without breaking the bank or requiring major construction. But what if you already have wallpaper on your walls? Can you just wallpaper over it? This is a common question that homeowners and renters alike often face when dealing with existing wallpaper. In this article, we will explore the pros and cons of wallpapering over wallpaper and provide you with a comprehensive guide to ensuring a successful job.
The Dos and Don’ts of Wallpapering Over Wallpaper: A Comprehensive Guide
Before diving into the process of wallpapering over wallpaper, it’s essential to know the do’s and don’ts of the job. These rules will set you on the right track and will help prevent costly mistakes and damage to your walls.
Do:
Thoroughly clean the existing wallpaper before applying the new one
Ensure the existing wallpaper is firmly attached to the wall
Use a primer before applying the new wallpaper
Consider the pattern and color of the existing wallpaper when choosing the new one
Don’t:
Apply new wallpaper over peeling or damaged existing wallpaper
Skip the primer before applying the new wallpaper
Paper over more than two layers of wallpaper
By keeping these do’s and don’ts in mind, you can avoid potential problems when wallpapering over existing wallpaper, and ensure a seamless, long-lasting wallpaper job.
Save Time and Money: How to Successfully Wallpaper over Existing Wallpaper
Wallpaper installation can be time-consuming and costly, but wallpapering over existing wallpaper can save you both time and money. It can also be a sustainable alternative to removing and disposing of old wallpaper. The process is pretty straightforward but requires some preparation and strategy.
Here are some tips for ensuring a successful wallpaper over wallpaper installation:
- Choose the right type of wallpaper
- Thoroughly clean the existing wallpaper
- Repair any damages to the existing wallpaper or wall
- Prime the existing wallpaper
- Match the pattern as closely as possible (or use a complementary pattern)
- Smooth out any bubbles or wrinkles with a wallpaper roller
- Trim excess wallpaper with a sharp wallpaper knife or scissors
By following these steps, you can achieve a beautiful and polished look without the hassle of removing old wallpaper.
Wallpaperception: Is It Possible to Wallpaper Over Wallpaper?
While wallpapering over wallpaper can be a great solution in some cases, there are some situations where it’s not advisable. Some wallpapers, particularly vinyl or foil wallpapers, may not be compatible with other wallpaper types or may not adhere properly to the wall when overlaid. Moreover, if the existing wallpaper is already peeling or damaged, adding another layer of wallpaper on top can worsen the problem and lead to a shabby finish.
If you are unsure whether your existing wallpaper can handle another layer, or if you have removed wallpaper in the past and found significant damage underneath, it might be best to consider alternative solutions such as painting, plastering, or removing the wallpaper altogether.
A Beginner’s Guide: Wallpapering Over Wallpaper Without Damaging Your Walls
Wallpapering over wallpaper may sound daunting, but with the right preparation and tools, even beginners can successfully tackle this job. Here’s a guide to get you started:
Step 1: Prepare your walls
Clean the existing wallpaper thoroughly with a wallpaper cleaner or a solution of trisodium phosphate (TSP) and warm water. Repair any damages or tears with patching compound or joint compound, and let it dry completely.
Step 2: Remove switch plates and outlet covers
Carefully remove all switch plates and outlet covers to avoid damaging them. Set them aside in a designated area, and label them for an easier reinstallation.
Step 3: Apply wallpaper primer
To ensure that the new wallpaper adheres correctly to the existing wallpaper, apply a primer that can grip on both surfaces. Use a paint roller or brush to apply the primer evenly.
Step 4: Measure and cut the new wallpaper
Measure the height and width of your walls and cut your new wallpaper according to the dimensions, leaving 2-3 inches of extra length at the top and bottom to accommodate for uneven cuts and wrinkles.
Step 5: Apply adhesive
Apply adhesive to the back of the new wallpaper using an adhesive spreader or paste brush. Be sure to apply adhesive to the edges of the wallpaper as well to prevent peeling or curling.
Step 6: Hang the new wallpaper
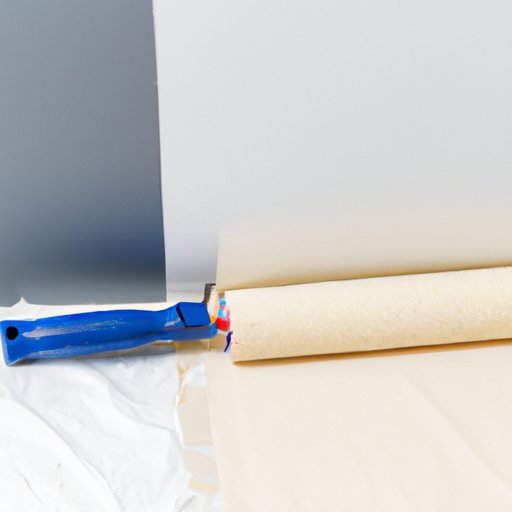
Align your new wallpaper against one wall and smooth it from the center outwards to remove any air bubbles or wrinkles. Then, align the next strip of wallpaper and repeat the process until you’ve covered all the walls.
Step 7: Trim the excess wallpaper
Using a wallpaper knife or scissors, trim any excess wallpaper at the top and bottom of the walls, leaving a smooth and clean edge.
Step 8: Reinstall the switch plates and outlet covers
Once the wallpaper has dried completely, carefully reinstall the switch plates and outlet covers.
By following these steps, you can wallpaper over wallpaper, refresh your walls and avoid causing damage or stress to your walls.
Maximizing Your Design Options: Exploring the Pros and Cons of Wallpapering Over Wallpaper
Wallpapering over wallpaper isn’t just a practical solution; it can also offer a wide range of design options, from using contrasting patterns to creating textured highlights on your walls. However, before making any design decisions, it’s essential to weigh the pros and cons of this particular technique.
- Pros
- Can save time and money on removing and disposing of old wallpaper
- Can add texture and character to your walls
- Can be a sustainable option
- Offers a range of design possibilities
- Cons
- The structural effects of adding an extra layer may not be desirable
- May be challenging to match the existing pattern exactly
- May not adhere correctly to all existing wallpaper or may cover up structural issues underneath
By fully considering these pros and cons, you can make an informed decision about whether or not to pursue wallpapering over wallpaper or opt for a different technique.
Transforming Your Walls with Ease: The Ultimate How-To Guide for Wallpapering Over Wallpaper
If you’ve decided to wallpaper over wallpaper, this step-by-step guide will walk you through the entire process from start to finish:
Step 1: Remove the wall plates
Remove all switch plates and outlet covers from your walls to avoid damaging them. Store them in one place, where they won’t get lost or damaged.
Step 2: Clean and Repair
Clean the existing wallpaper thoroughly and repair any tears, dents, or damages.
Step 3: Apply Wallpaper Primer
Apply a wallpaper primer to the existing wallpaper using a paint roller or brush. A good primer will create a surface that both the existing and new wallpaper can adhere to.
Step 4: Select the New Wallpaper
Choose your new wallpaper by considering the existing wallpaper’s color, pattern, and texture. You can either choose a complementary design for a coordinated look or a contrasting one for a bold statement piece.
Step 5: Measure and Cut the New Wallpaper
Measure your walls’ height and width, then cut the new wallpaper to fit, leaving an extra 2-3 inches at the top and bottom to accommodate irregularities and warpings.
Step 6: Apply Adhesive
Apply adhesive to the back of the new wallpaper using a paste brush or adhesive spreader.
Step 7: Apply the New Wallpaper
Align the new wallpaper along one wall’s edge and press it against the wall from the center outwards to get rid of any bubbles. Realign and continue with this process until you’ve covered all the walls.
Step 8: Trim the Excess Wallpaper
Trim the excess wallpaper at the top and bottom of the walls with a wallpaper knife or scissors.
Step 9: Reinstall the Wall Plates
Once the wallpaper has dried completely, carefully reinstall the switch plates and outlet covers, ensuring they line up correctly with the holes already made.
By following our step-by-step guide and having patience, you’ll be able to revamp your walls with no stress or significant costs.
Conclusion
Wallpapering over wallpaper can be an excellent alternative to wall stripping and painting, but it’s important to follow the necessary precautions and guidelines carefully. By cleaning, priming, and repairing the existing wallpaper, you can wallpaper over wallpaper and achieve seamless results. Know when to call on the services of professionals and when to save money by handling small jobs yourself. Remember to weigh the pros and cons before making a final decision and be confident in your newfound wallpapering abilities.
If you’re ever stuck or confused, don’t hesitate to seek advice from expert wallpaper installers or a home improvement professional. Wallpapering over wallpaper can enhance your home, so go ahead and give it a try.


