Introduction
When you have invested in treated wood for outdoor projects such as decks, fences, gazebos, or planter boxes, it is essential to protect it for durability and longevity. Staining treated wood can elevate its aesthetic appeal while providing protection against sun and water damage, warping, cracking, and rotting. In this ultimate guide, we will explore whether you can stain treated wood, how to do it, and common mistakes to avoid.
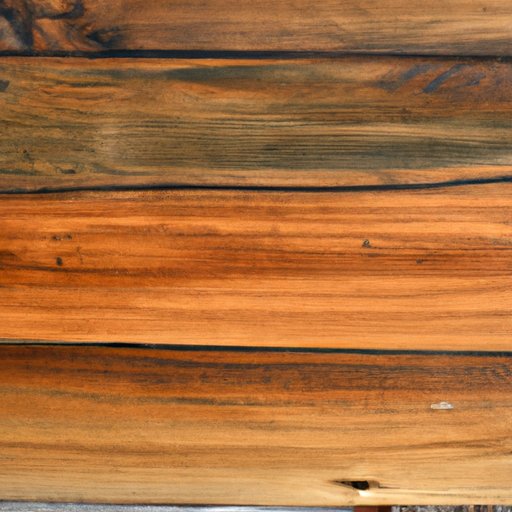
The Ultimate Guide to Staining Treated Wood: What You Need to Know
The first step in staining treated wood is to understand its characteristics and benefits. Treated wood refers to lumber that has undergone chemical treatment to protect against decay and insect damage. There are three main types of treated wood: pressure-treated, copper-based, and wet wood. Depending on the type of treatment, the wood may be slightly oily or contain moisture sealer, which can affect the staining process.
Some of the reasons for staining treated wood include:
- Enhancing the natural beauty of the wood grain
- Protecting against sun, rain, and wind
- Minimizing the effects of aging and wear and tear
- Preventing cracking, splitting, and warping of the wood
Using a stain on treated wood provides several benefits such as:
- Improving the overall appearance and curb appeal of your outdoor space
- Increasing the lifespan of the treated wood
- Reducing the likelihood of future maintenance, repairs, or replacement costs
Can You Really Stain Treated Wood? The Truth About the Process
There are many myths surrounding the staining of treated wood, such as, it is not possible to stain it because of the treatment chemicals or the color won’t come out as expected. The truth is that you can stain treated wood, but you need to follow the correct process for optimal results.
One of the most important things to consider when staining treated wood is to ensure that it is dry and clean. You should also avoid applying a stain to newly treated wood as it requires time to cure and off-gas any possible chemicals. You will need to remove the surface layer or weathering before staining the treated wood properly.
There are different methods of staining treated wood, such as using a paintbrush, spray gun, or roller. The most popular method is using a paintbrush to ensure that the stain penetrates the wood fibers adequately. You can also choose between oil-based or water-based stains, each with its advantages and disadvantages.
The step-by-step process of staining treated wood includes:
- Clean and dry the treated wood surface
- Remove any existing paint or sealer from the treated wood
- Apply the chosen stain according to the manufacturer’s instructions, using a paintbrush or spray gun
- Allow the stain to dry properly
- Apply a second coat of stain if necessary, based on the desired depth of color
A Step-by-Step Tutorial on How to Stain Treated Wood Perfectly
The key to staining treated wood perfectly is in the preparation. Before applying the stain, you should clean the surface thoroughly using a deck cleaner. You can use a power washer or scrub the surface with a stiff-bristled brush to remove dirt, grime, and any existing surface layer.
It is also crucial to ensure that the treated wood is completely dry before applying the stain, especially if the wood has been pressure-treated. You can test the dryness of the wood surface by sprinkling a few droplets of water onto it. If the water droplets soak in, then the wood is ready for staining.
When applying the stain, it is recommended to use a high-quality paintbrush with either synthetic or natural bristles. Paintbrushes are better suited for treated wood as they allow the stain to penetrate the wood fibers adequately and last longer. You can also use a roller or sprayer, but these methods can lead to over-application and uneven coloring if not carefully handled.
When staining treated wood, it is advisable to work in small sections rather than trying to cover a large area at once. Start the application from the top and work your way downwards, ensuring that there are no drips or runs. Also, avoid painting/staining your outdoor area in direct sunlight, extremely hot, or windy days to ensure the paint dries properly.
You should also wear protective gear such as gloves, goggles, and a mask to avoid inhaling any fumes or chemicals.
Common Mistakes to Avoid When Staining Treated Wood
Even with proper preparation and application, staining treated wood can go wrong if you make some common mistakes.
One mistake is omitting preparatory steps such as cleaning and drying the surface thoroughly. Another common mistake is over-applying the stain, leading to a sticky and uneven finish, or not waiting long enough for the first coat to dry before applying another coat.
Waiting too long to stain treated wood is also a mistake. When you leave treated wood exposed to weather elements for too long before staining, it may absorb too much moisture, which can interfere with the staining process and adversely affect the final outcome. You should stain treated wood within a month of its installation.
Expert Tips and Tricks for Staining Treated Wood Like a Pro
If you want a professional-looking stained wood finish, you can follow these expert tips:
Choosing the right brush and techniques for application, such as following proper brushing or rolling techniques to avoid drips and runs, can improve the quality of the finished surface.
Selecting the best stain color and quality for treated wood depends on factors such as the location of the wood (indoor/outdoor), the wood type, and personal preferences. High-quality stains with UV-resistant additives are ideal for outdoor areas that receive a lot of sunlight, while opaque stains offer better coverage and color depth to conceal blemishes.
Understanding the best conditions for applying stain to treated wood, such as in temperatures between 50°F and 90°F and on a dry and non-windy day, helps to achieve optimal results.
Comparing the Best Stains for Treated Wood: Which One to Choose?
There are different types of stains available for treated wood, such as transparent, semi-transparent, solid, and toners. Transparent stains provide the most natural look and highlight the wood’s natural texture, while semi-transparent stains offer some color to the wood and conceal blemishes. Solid stains offer the most color depth and are suitable for high-traffic areas, while toners provide a light protective layer against UV rays and minimal color depth.
Some of the best stains for treated wood include:
- Ready Seal 112 Natural Cedar Exterior Wood Stain and Sealer
- Defy Extreme Wood Stain
- Thompson’s WaterSeal Advanced Natural Wood Protector
- Cabot Australian Timber Oil Wood Stain
- Minwax Wood Finish
Factors to consider when choosing which stain to use on treated wood include transparency, color depth, durability, and protection against UV rays, moisture, and mildew.
Conclusion
To extend the life of your treated wood, staining is an excellent option. Although there are several myths about staining treated wood, it is possible to do it yourself as long as you follow the correct process and avoid some common mistakes. Remember to prepare the treated wood thoroughly, choose the right stain and procedures for application, wait for the right time (not too long) to stain, and wear protective gear. The Best practices will extend the lifespan of treated wood and transform the appearance of your outdoor area.
So, go ahead and stain your treated wood, whether it’s a deck, fence, or planter, and enjoy the benefits for years to come.


