I. Introduction
Spooling a spinning reel can seem like a daunting task for beginners. However, with a little bit of practice, it can be done with ease. This article aims to provide a step-by-step guide on how to spool a spinning reel for those who have encountered difficulties or never done it before. It covers the seven important topics related to spooling a spinning reel.
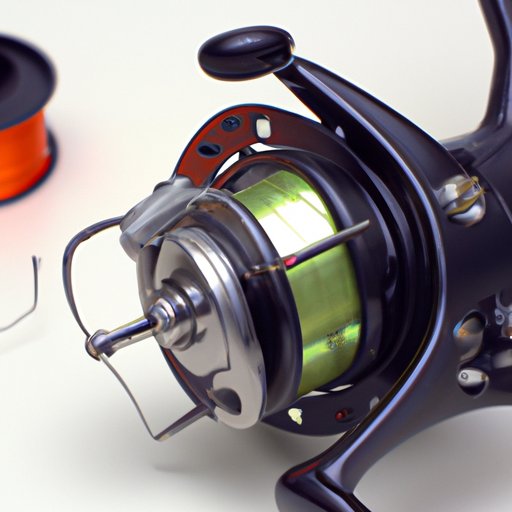
II. Step-by-step approach
Spooling a spinning reel involves several steps, including attaching the line to the reel, guiding the line onto the spool, and tying off the line. Here are the basic steps:
- Attach the line to the reel
- Open the bail and guide the line onto the spool, ensuring there is no line twist
- Fill the spool almost to the edge, leaving enough room for the casting and leader knots
- Close the bail and start reeling the line onto the spool under tension
- As you fill the spool, watch for line twist, and correct it if necessary
- Leave about 1/8 inch of space between the line and spool edge
- Tie off the line and trim the excess
It’s important to note that different reels may have unique requirements. Make sure to check the manufacturer’s instruction manual before spooling the reel.
III. Visual learning
To help with visualization, here’s how to spool a spinning reel one step at a time:
- Attach the line to the reel
- Open the bail and guide the line onto the spool, ensuring there is no line twist
- Fill the spool almost to the edge, leaving enough room for the casting and leader knots
- Close the bail and start reeling the line onto the spool under tension
- As you fill the spool, watch for line twist, and correct it if necessary
- Leave about 1/8 inch of space between the line and spool edge
- Tie off the line and trim the excess


IV. Use a tutorial
Here’s a tutorial format that walks you through how to spool a spinning reel:

V. Speak from experience
When spooling a spinning reel, common mistakes include not attaching the line to the reel correctly and failing to look out for line twists. It’s important to avoid these errors to ensure optimal performance of your reel. Here are some practical tips and tricks:
- Use a monofilament line with spinning reels since it’s flexible and easy to handle
- Put the spare monofilament line into hot water to prevent twisting when reloading it later
- Don’t overfill the spool with line, as it could lead to tangles
- Hold the spool still while reeling in the line
VI. Focusing on materials
Choosing the right line type for your spinning reel is crucial. Braid, monofilament, and fluorocarbon are the most popular line types available. Consider the following:
- Braid line is recommended for larger fish that put a lot of stress on your reel. However, it’s not recommended for spinning reels with small spools since it may cause tangles or knots
- Most spinning reel manufacturers recommend using monofilament lines on their reels. It’s versatile, easy to handle, and stretches well. They also have low memory, making them tangle-free
- Fluorocarbon is a popular choice for anglers since it’s invisible in water and offers the best sensitivity. However, it’s stiff and not suggested for beginner reel-spoolers
When spooling your spinning reel, ensure that the line fills the spool evenly. Crisscrossing the line will result in line twists, which could harm the performance of your reel. Additionally, pre-soaking the line in warm water could improve performance, especially if it’s before it’s cold weather.
VII. Troubleshooting
Spooling a spinning reel can sometimes be a complicated process. Despite your best efforts, issues can arise. Common errors that occur when spooling a spinning reel include:
- Line twists – caused by spinning the spinning reel while the line is not going onto the spool correctly
- Bird’s Nest – when the line bunches up or tangles on itself during a cast
- Not reeling in the line tightly enough – can cause the line to become loose, resulting in bird’s nests
- Not properly aligning your spinning reel – will cause line twist as the line goes on the spool at odd angles
If you encounter any of these issues, don’t panic. Instead, try these solutions:
- Line twists – hold onto both the spool of new line and the spool of the old line. The spool of the old line acts as an anchor to prevent the occurrence of line twist
- Bird’s Nest – gently pull the line from the reel to remove the tangles. Leave only enough line on the spool to avoid any overfill or line twisting during subsequent casts
- Not reeling in the line tightly enough – always keep tension on the line as you reel it in
- Not properly aligning your spinning reel – Ensure that the line is going onto the spool properly. How to do this depends on the spinning reel. Consult the company’s manual to learn about properly aligning the reel.
VIII. Best practices & maintenance
After using your spinning reel, it’s essential to clean it to ensure it performs well and lasts longer. Here are some tips:
- Clean your spinning reel after each use
- Use lubricants on all moving parts
- Store your spinning reel in a dry place
- Replace wearable parts when needed
When your spinning reel isn’t in use, cover it with a protective cover to avoid dust and other debris that could clog the moving parts.
IX. Conclusion
Spooling a spinning reel can be a challenging task for beginners. However, with proper guidance and tips, you can succeed. You’ve learned about the basic steps and various errors while spooling a spinning reel, the best materials to use, and best practices. Now, it’s up to you to put into practice what you’ve learned. We look forward to hearing from you about your experiences.


