Introduction
If you’re a fan of Naruto and you struggle with drawing the beloved character Kakashi, you’re not alone. Drawing anime characters can be daunting, but with a step-by-step guide and some helpful tips, you’ll be able to master the art of drawing Kakashi in no time.
Step-by-Step Guide: How to Draw Kakashi from Naruto
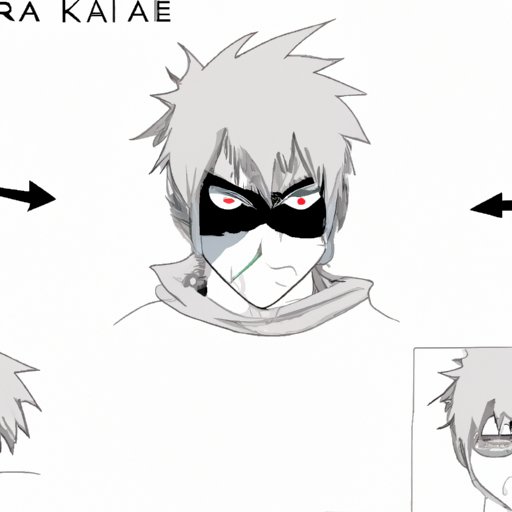
First, start by drawing a perfect circle for the head. Add vertical and horizontal lines to divide the circle into four equal parts. These lines will help you place the facial features. Draw his mask over his nose. Then, draw his spiky white hair and make sure you follow the shape of the head. His hair is probably one of the most unique and important features of him.

Next, it’s time to add his facial features. Draw two small eyes that are tilted downward and add in a few wrinkles on the forehead and in between his eyes for a serious look. Draw his scar vertically over his left eye.
After this, add the lower half of his face and give him a chin. Don’t forget to add his headband which includes the Konoha symbol and also covers his forehead.

Finally, draw his body and outfit. Add his flak jacket, which looks like a vest, and his gloves that cover his hands. Draw his legs in a stance that looks like he is walking or in a sense of movement.

Take your time with this step-by-step guide and make sure each feature looks just right. Remember, practice makes perfect!
Mastering the Art of Kakashi Drawing: Tips and Tricks
Now that you have mastered the basics, it’s time to take your Kakashi drawing skills to the next level. Here are some tips and tricks for making your drawing look more dynamic and realistic:
- Use shading techniques to add depth and dimension to your drawing. Shadow the sides of his face, his neck, and his shirt to give the drawing more realistic lighting.
- Pay attention to proportions and perspective. Make sure all of Kakashi’s features are in proportion to each other and that his body looks like it is in the correct perspective.
- Use reference images to help guide your drawing. Find images of Kakashi from different angles to help you get a better sense of his facial features and body shape.
Drawing Kakashi for Beginners: Easy Tutorial with Pictures
If you’re new to drawing or you struggle with it, don’t worry! We have a simplified tutorial that breaks down the process into easy-to-follow steps:
- Start with a circle for the head and draw lines to divide it into four equal parts.
- Draw his spiky hair that covers the sides and back of his head.
- Add his facial features one by one, including his small, energetic eyes, his nose and mouth, and his scar.
- Add his flak jacket and gloves.
- Finish with his pants and shoes.
With this simplified tutorial, you’ll be able to create a polished drawing of Kakashi in no time!

Improving Your Kakashi Drawing Skills: Common Mistakes to Avoid
When drawing Kakashi, there are some common mistakes that people make that can take away from the overall quality of the drawing. Here are some mistakes to watch out for:
- Proportion: Make sure all of his features are in the correct proportion to each other. If his eyes are too big or his head is too small, it will make the drawing look off.
- Shading: Be careful with how you shade. Use a light hand when shading, and make sure to build up the darkness slowly so you don’t risk overwhelming the drawing with too much shading.
- Perspective: Make sure Kakashi’s body looks like it is in the correct perspective, or the drawing will look flat and lacking in dimension.
Finding Inspiration to Draw Kakashi: Exploring Different Styles
There are many different styles and approaches to drawing Kakashi, whether you want a more realistic depiction or a more stylized or cartoonish look. Here are some different styles to explore:
- Realism: Try to create a more realistic portrayal of Kakashi by adding in realistic lighting and shading.
- Chibi: Go for a more stylized or cartoonish approach by depicting Kakashi in a chibi style, with big heads and small bodies.
- Action: Experiment with drawing Kakashi in action poses, such as while using his jutsu or throwing kunai knives.
Drawing Kakashi in Action: How to Convey Movement and Flow
When drawing Kakashi in action, there are some techniques you can use to convey movement and flow. Here are some to try out:
- Action lines: Add in lines around Kakashi’s arms and legs to depict motion.
- Dynamic poses: Experiment with different poses that look like they are in motion, such as Kakashi jumping, running, or throwing kunai knives.
- Speed lines: Add in speed lines behind Kakashi to give a sense of movement.

Getting Creative: Experimenting with Different Kakashi Poses and Expressions
Once you have the basics down, it’s time to get creative and experiment with different poses and expressions for Kakashi. Here are some ideas to get you started:
- Smiling: Draw Kakashi with a big smile, which is a rare sight but still a happy sight.
- Serious: Draw Kakashi with a serious expression, reflecting his no-nonsense and serious nature.
- Casual: Draw Kakashi outside of his usual ninja attire and in more casual clothes.
Conclusion
Drawing Kakashi from Naruto can be challenging, but with the right approach and some practice, anyone can do it. Whether you’re a beginner or an experienced artist, follow the steps and tips outlined in this guide to create your own stunning depiction of Kakashi. Don’t be afraid to experiment with different styles, poses, and expressions to make the drawing unique to you.


