Introduction
Looking for a classic hairstyle that you can rock at any event? Look no further than the timeless French twist. This sophisticated updo has been around for decades and continues to be a popular choice for weddings, proms, and other formal occasions. In this article, we’ll provide a step-by-step guide along with a video tutorial to help you perfect the French twist and make it your own.
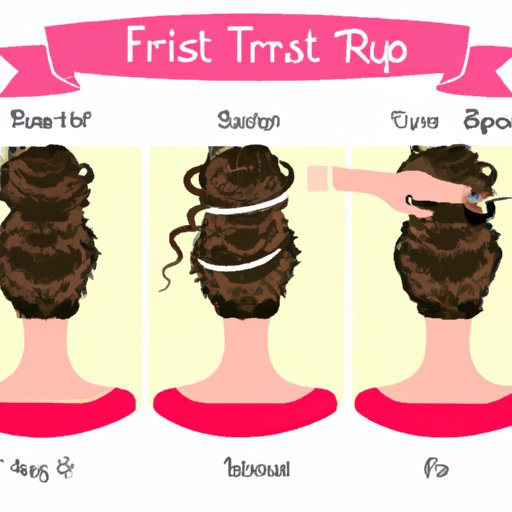
Step-by-Step Guide to the Classic French Twist
Before we get started, it’s essential to understand that creating a French twist requires a bit of practice and patience. However, once you’ve mastered it, you’ll have a versatile hairstyle that you can wear time and time again.
Step One: Prep Your Hair
Before you start sectioning and pinning your hair, you’ll want to comb through it thoroughly. Use a comb or brush to smooth down any tangles or knots, making sure that your hair is as sleek as possible.
To give your hair some grip, use a light-hold hair product that adds texture to your hair. For example, apply a small amount of volumizing mousse or texturizing spray to your roots. This step can make a significant difference in the longevity of your style.
Step Two: Section Your Hair
The French twist requires relatively long hair, so if your hair is short, consider using hair extensions to achieve the look. Start by parting your hair down the center of your head to divide it into two even sections.
Next, gather the top section of your hair and hold it straight up. Comb it once more to make sure there are no knots or tangles, then twist it downward into a rope-like shape.
Step Three: Secure the Twist
Once you’ve twisted your hair, hold it straight up against the back of your head. Keep your hair smooth and taut as you start to roll it down toward the nape of your neck. You’ll need to roll it tightly to ensure that it stays in place for the duration of the event.
As you roll your hair, make sure your fingers stay on the outside to smooth out any bumps or creases. When you get to the bottom, secure the twist with bobby pins.
Step Four: Secure the Sides
Once you’ve rolled your hair down to the nape of your neck, secure the sides of your hair with additional bobby pins. You’ll want to ensure that the twist stays in place, so make sure that you use enough pins to hold the hair.
If there are any loose strands or creases in the twist, use bobby pins to tuck them in and hold them in place.
Step Five: Set the Look with Hairspray
Once you’ve secured your French twist, it’s essential to set the hairstyle with hairspray. Use a light- to medium-hold hairspray to hold the style in place and prevent flyaways and frizz.
You can also use a texturizing spray to add extra hold and volume to your hair if it is too fine or limp.
Video Tutorial
For those of you who prefer a visual guide to the French twist, check out this video tutorial: [insert link here]. This tutorial offers a step-by-step guide to creating the classic French twist, along with helpful tips and tricks.
Points to Note in the Video:
– Take small sections and always smooth the hair down as you go.
– Pins should be placed in a criss-cross pattern to secure the twist and prevent it from falling out.
– End the twist close to the head to avoid bulk and an untidy appearance.
– Add a hair accessory or braid to the twist to switch up the style.
Tools Needed for French Twist
To create the perfect French twist, you’ll need a few essential tools. These items include bobby pins, hairspray, brushes, and combs.
Where to Purchase the Tools
Most drugstores and beauty supplies stores carry these tools. You can also purchase them online from Amazon or other retailers. When selecting bobby pins and other accessories, try to choose ones that match your hair color to avoid any noticeable pins.
What to Look for in Each Product
– Bobby Pins: Make sure that they are sturdy and have a good grip to hold the hair in place. Choose ones that match your hair color.
– Hairspray: Look for a light- to medium-hold spray that will hold your hair without making it stiff or crunchy.
– Brush and Comb: Use a brush to smooth out your hair and a comb to part and section it. Choose ones with small or narrow teeth to glide through your hair easily.
Variations and Adaptations
One of the best things about the French twist is its versatility. You can experiment with different variations and adaptations to make the style your own. Some variations include the messy French twist, adding braids, half-up French twist, and adding accessories.
To create a messy French twist, use the same basic steps listed above, but instead of rolling your hair tightly, leave it loose for a textured, tousled look. You can also add a braid to the French twist, either along the side or through the center of the twist.
Accessories like sparkly pins or a headband can add an extra level of sophistication to the style. Experiment with different ways of accessorizing to find what works best for your hair type and personal style.
Styling Tips and Tricks
To make creating a French twist easier, try the following tips:
– Use bobby pins that match your hair color for a seamless look.
– Texturize your roots with volumizing spray to add volume and texture.
– Use hairspray on the twisted hair before rolling it up to make it more manageable.
– If your hair is thin, consider using hair extensions to get the length necessary for the French twist.
Perfect for Different Occasions
The French twist is a versatile style that works for various occasions, including:
– Weddings
– Proms
– Work events
– Red carpet events
– Cocktail parties
To make the French twist more casual, try loosening up the style by adding braids or accessorizing it with a fun headband.
Conclusion
Creating a classic French twist isn’t as daunting as it may seem. With a little bit of practice, you can perfect the technique and make this style your go-to for formal events. Remember to experiment with variations and accessories, so your French twist can reflect your personal style.
With our step-by-step guide, video tutorial, and styling tips, we hope this article has inspired you to rock this classic updo and own it, no matter the occasion.


