I. Introduction
As homeowners, we are always looking for ways to add functionality and beauty to our outdoor spaces. Installing pavers can be the perfect solution to achieving both. Pavers are a versatile and durable option that can be used for anything from walkways and driveways to patios and pool decks.
Proper installation is crucial to ensure the longevity and functionality of your paver project. In this guide, we will take you through the process, from planning and preparation to finishing touches, and provide tips to help you avoid common mistakes.
II. Planning and Preparation
A. Measuring the area and calculating the materials required
Before beginning any paver project, it is essential to accurately measure the area to determine the amount of materials needed. This includes the pavers themselves and the base materials required to support them.
To calculate the area, multiply the length and width of the space. This will give you the total square footage. It is recommended to add an additional 5-10% to account for cuts and waste.
Next, calculate the amount of base materials needed. Typically, a good rule of thumb is to have a base that is approximately 4-6 inches deep. This can vary depending on the type of soil in your area and the expected weight that will be placed on the pavers. As a general guide, one ton of base material can cover approximately 100 square feet at 2 inches deep.
B. Choosing the right type of pavers
Pavers come in a variety of materials, including concrete, brick, and natural stone. When choosing your pavers, consider the overall look and feel you are aiming to achieve. Concrete pavers, for example, come in a range of colors and patterns allowing for a customized design. Natural stone pavers, on the other hand, are known for their unique colors and textures and are a great option for creating a more natural look.
C. Preparing the ground for installation
Proper preparation of the ground is crucial to the success of your paver project. The first step is to remove any existing grass, weeds, or other debris. Next, ensure the area is level and create a slight slope away from any structures to promote proper drainage. It is recommended to have a slope of approximately 1/4 inch per foot.
Finally, compact the soil using a hand tamper or gas-powered compactor. This will help ensure a stable base for your pavers.
III. Step-by-Step Installation Guide
A. Marking the layout
Before laying any pavers, it is essential to mark out the layout to ensure a proper fit and design. Use string and stakes to mark the edges of the area, taking care to ensure angles and curves are accounted for.
B. Laying the base material
Once your ground is properly prepared, it is time to add the base material. This can include a layer of gravel or crushed stone, followed by a layer of sand. When adding the sand, ensure it is level and smooth.
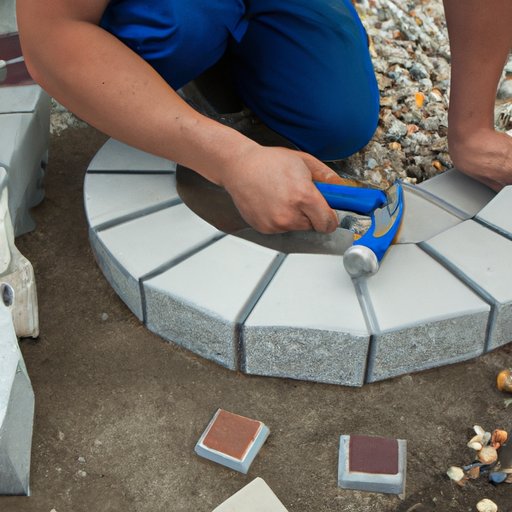
C. Setting the pavers
Begin by laying the pavers along the edge of the space, taking care to leave space in between each paver for joint sand. When placing the pavers, ensure they are level and fit snugly against one another. Use a rubber mallet to adjust any pavers that may be uneven.
D. Cutting the pavers
Inevitably, some pavers will need to be cut to fit the design of your space. This can be done using a wet saw or a chisel and hammer. Always wear protective gear, such as safety glasses and gloves, when cutting the pavers.
E. Finishing touches
Once all pavers are in place, it is time to add the joint sand. This will help lock the pavers together and prevent shifting over time. Use a broom to spread the sand evenly over the pavers, then use a compactor to ensure it settles into the joints.
IV. Common Mistakes to Avoid
A. Failure to Prep the Area
One of the most common mistakes when installing pavers is failing to properly prepare the ground. Skipping this essential step can lead to uneven pavers, shifting, and poor drainage.
B. Poor Drainage
Inadequate drainage can lead to water buildup, which can cause pavers to shift and become uneven over time. Ensure proper slope and drainage systems are in place before beginning your project.
C. Substandard Base Material
The quality of the base material used is crucial to the success of your paver project. Skimping on this step can lead to an unstable base, resulting in shifting and uneven pavers.
D. Lack of Enough Joint Sand
Joint sand is a crucial component of your paver project. It helps to lock the pavers in place and prevent shifting. Not using enough sand, or using the wrong type, can lead to a weak base and shifting over time.
V. Solutions to Common Installation Mistakes
A. Proper Site Preparation
Take the time to properly prepare the site before beginning your project. This includes removing any debris, ensuring a level surface, and creating proper drainage systems.
B. Drainage Systems
Ensure proper slope and drainage systems are in place before beginning your project. This may include installing a french drain, building up the slope, or creating a gravel bed.
C. Installing Quality Base Material
Invest in quality base material to provide a stable foundation for your pavers. This may include crushed stone, gravel, or sand.
D. Proper Joint Sand Application
Use the correct type and amount of joint sand to ensure a solid base for your pavers. Always read the manufacturer’s instructions and use an adequate amount of sand to fill the joints.
VI. Necessary Tools and Materials
A. Key Tools
- Gloves
- Safety Glasses
- Rubber Mallet
- Circular Saw or Wet Saw
- Hand Tamper or Gas-Powered Compactor
B. Additional Materials
- Pavers
- Base Material (crushed stone, gravel, or sand)
- Joint Sand
- String
- Stakes
VII. Real-life Examples
A. Photos of Before-and-After Projects

B. Testimonials from Satisfied Customers
“I couldn’t be happier with my new paver patio. The installation process was seamless, and the finished product looks fantastic!” – John D.
VIII. Conclusion
A. Recap of important points
Proper installation of pavers is crucial to ensuring the longevity and functionality of your outdoor space. Begin by accurately measuring the area and choosing the right type of pavers. Proper preparation of the ground, including creating proper slope and drainage systems, is essential. Follow the step-by-step installation guide, including setting the pavers, cutting as necessary, and applying joint sand. Avoid common mistakes by properly prepping the area and using quality materials. Finally, use the necessary tools and materials, including a circular saw or wet saw and base materials, to get the job done right.
B. Encouragement to try the project
Installing pavers can be a fun and rewarding DIY project for homeowners. Take the time to properly plan and prepare, and follow the step-by-step guide to achieve a beautiful and functional outdoor space.
C. Reminder of available help
As always, if you are unsure about any aspect of the installation process, seek the help of a professional. Many landscaping companies offer paver installation services, allowing you to sit back and relax while they do the hard work for you.


